Tasty and mostly simple food for the whole family.

Tasty, healthy, simple, verstile, practical, seasonal, fun food for all to enjoy. I will endeavour to make things gluten-free, dairy-free (cow's milk only here, I'm not super-human), and low sugar as able. I hope others feel motivated to add their recipes to this collection so we can all try them. Thank you!
Showing posts with label Dairy-Free. Show all posts

Thursday, March 5, 2015

Almond Date Bars (gluten-Free/Dairy-Free)

These bars are so decadent tasting!  I am typically loath to deal with chopping and mixing dates due to the high-maintenance nature of the beast, but here I can't get enough.  I find that if I chop them and toss them in the dry mix a bit, then it is easier to use my hands to just break them up a bit.  Heck, this might even make a near-Paleo list if you wanted to get so ambitious to sub in coconut for the oats or something crazy like that.  I have played around with lots of variations in the wet ingredients and all are delish- subbing applesauce for part of the oil and/or part of the honey, agave or coconut syrup for honey.... all good!  Might have to try subbing in some pumpkin next with extra spices. 

These hold up well to freezing for later, but it is critical to make a double batch to allow for this practice, otherwise you wont have enough.  I am amazed at how many of those little crumbs keep needing to be pinched up and gobbled as I walk past the pan.  Suddenly there is only an odd sized piece left, and it always needs to be squared up....  I also imagine that this could be used as a mighty-healthy option for a crumble topping on an apple crisp.   

These have been adapted from a recipe by Deb Perelman from the Smitten Kitchen Cookbook for Almond Date Breakfast Bars.  A great cookbook cover to cover!


Almond Date Bars
  • 1 cup chopped dried pitted dates
  • 1 1/4 cup rolled oats 
  • 3 Tbs flour (I use my AP gluten-free flour blend, any type will do)
  • 1/3 cup flax meal
  • 1/2 cup thinly sliced almonds
  • 1/2 tsp salt (scant tsp)
  • 1/4 tsp ground cinnamon 
  • 1/4 cup almond butter
  • 1/4 oil (see note above)
  • 1/4 honey
  • 1/8 tsp almond extract
Directions
1. Preheat oven to 350deg and line an 8x8 pan with parchment paper. 
2. Mix together all of the dry ingredients in a medium sized bowl.
3. Whisk together all of the wet ingredients in a small bowl (I just measure them all together in a 2c glass measuring pitcher for ease of clean up).
4. Pour the wet ingredients into the dry mix and stir very well to make sure all is well coated, then pour into your prepared pan.  Smash it down hard, pressing into all of the corners and such.  This will help it all stick together later so make sure it is well smushed.
5. Bake the bars 20-25 minutes until browned around the edges and top a bit, then cool completely on wire rack in the pan.

Note: It is best to completely cool before trying to lift out or they may crack a bit, forcing you to perform the aforementioned crumble clean up. Cut into squares and enjoy!


Tuesday, October 15, 2013

Pumpkin Chia Cookies! (Gluten-free/Dairy-Free)

As per usual, I am always trying to maximize my baked goods full of complex grain/seeds, fruits and veggies for my 5-year-old who is a Particular Eater. This is typically easier this time of  year when pumpkin is more on the radar because she loves the complex flavors of pumpkin baked goods.  I have no idea why this works for her delicate palate, but I try just to be grateful. 

Well, now enter the 10-month-old who is a seriously complex eater already, but somehow is low on iron. Ok, so I do actually know that red meat could help, but I've got a thing about handling blood.  I'm much better with this arena.  I put this recipe together to incorporate pumpkin seeds which are a decent source of iron (14% RDA/ 1/4 cup) and then got all excited about using teff flour which is even higher in iron (20%/1/4 cup) and blackstrap molasses (15%/Tbs).  They are really high in protein and fiber for baked goods so the glycemic load is nicely reduced, making this the new Everyday Cookie for us!

These are quite moistureful- unlike many gluten-free baked goods.  Surely you could add some banana in somewhere and if you wish, increase the sugar.  I don't have much of a sweet tooth and the girls have never complained, so I keep it pretty low.  

Pumpkin Chia Cookies  (Makes about 3 dozen 1oz cookies)
  • 3/4c almond flour (I use almond meal from TJs)
  • 1/2c flour (*see note below)
  • 1/4c ground pumpkin seeds**
  • 1tsp cinnamon
  • 1/4tsp salt
  • 1/2tsp baking soda
  • 1Tbls chia seeds mixed with 3Tbls hot water (or sub an egg)
  • 1/3c coconut oil at room temp or butter
  • 1/3c pumpkin (canned or freshly roasted)
  • 1/4c brown sugar
  • 1tsp vanilla 
  • 1Tbls molasses (optional but extra yummy) 
*Flour note: I haven't used wheat flour here at all but presumably it works.  I typically use 1/4c teff flour and 2Tbls each garbanzo/brown rice flour

**I put pumpkin seeds in a standard mason jar and screw the blender bottom on to it and then grind them up for a few seconds, works great to make a flour-like texture.  You could use food processor, blender or serious chopping.
 

Directions (preheat oven to 350deg)
1. Mix chia and water together in small dish and let rest about 10 min

2. Meanwhile, sift together all dry ingredients in medium bowl- this  mixes them and will break down little chunks of nut flours and such that seem to form.

3. Mix together all wet ingredients along with chia/water mixture.  I actually just put them all in my narrow measuring cup and use my immersion blender to mix the heck out of them

4. Combine wet ingredients in with the dry, then scoop 1Tbls drops onto parchment-lined baking sheets, then flatten the cookies a little with your fingers or the back of a spoon.  Bake 12-13 minutes. 

Enjoy!

Monday, June 24, 2013

Healthy Delicious Brownies (Gluten Free/Dairy Free/Grain-Free/Refined Sugar-Free)

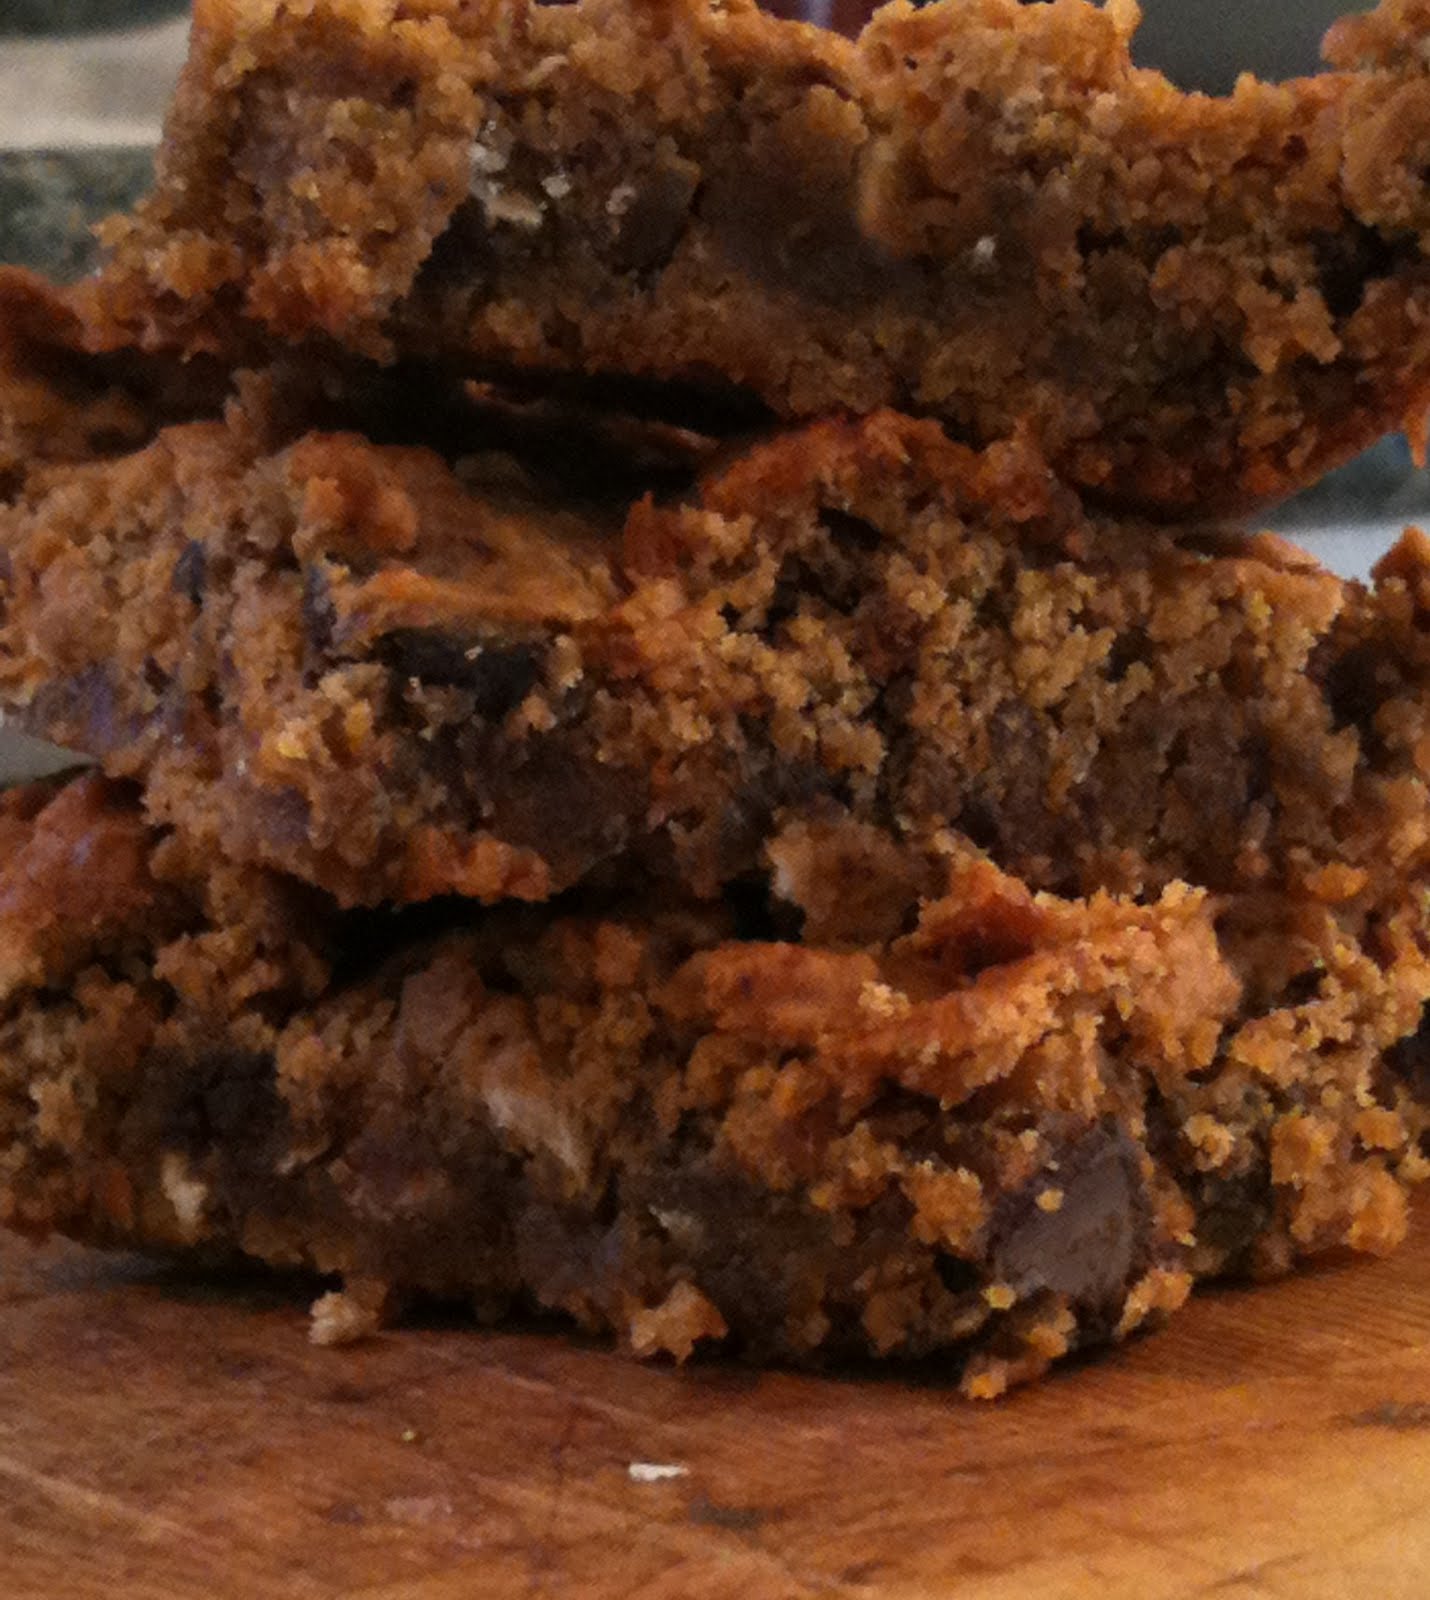
These brownies haven't lasted more than 24 hours in our house.  As you will see, they are quite appropriate for breakfast and snacks so they are never long for the world.  And in this house where my oldest kiddo won't eat protein, this is oh, so satisfying!  These are so fast to make and (I think this is a good thing) not too rich.  The recipe I adapted this from used just nuts and no garbs, but I think the texture benefits from the addition of the beans giving it a more moisturefull crumb.  They are a bit reminiscent of Chocolate Chip Blondies.  I Recommend getting enough ingredients to make two batches because they will go fast.

Killer Brownies
  • 1cup raw walnuts or pecans (or try almonds and let me know!)
  •  ⅓ cup cocoa powder 
  • ½ teaspoon baking soda 
  • ¼ teaspoon sea salt 
  • 1cup garbanzo beans, rinsed and drained 
  • 2 large eggs 
  • ½ cup maple syrup 
  • 1 tablespoon vanilla
  • Optional (not optional)- 2-4 Tbls mini semi-sweet choc chips
Directions
 Preheat oven to 350 degrees F. Grease an 8 x 8-inch glass baking dish.

Place the nuts into a food processor fitted with the “s” blade. Process until very finely ground, stopping just before they turn into nut butter. Then add the remaining dry ingredients and pulse again to combine. Add the rest of the ingredients and process again until smooth. You will still have tiny bits of nuts visible- this is OK even if you are a nut-in-your-brownie type like me.

Pour batter into baking dish. Spread evenly into pan with a rubber spatula or spoon and sprinkle on and lightly swirls in the chips if using. Bake for 25 minutes. Cool for about 20 minutes before slicing.

Adapted from The Nourishing Meals Cookbook by Alissa Segersten and Tom Malterre, MS,  CN

Monday, April 15, 2013

Roasted Garbanzo Beans with Nutritional Yeast (Gluten/Dairy free)


This is a new twist on an old favorite. It was over a year ago that I originally wrote about Roasted Garbanzo Beans and our consumption has not changed around here except for a slight hiccup during my first trimester when all-things-not-hot-and-sour-soup were off the list.  Since clearing that hurdle, we are all in again.  I rarely deviate from my favorite mix of Old Bay seasoning and Curry powder, but on a whim the other day, I used some Nutritional Yeast I had in the drawer and it was DYNAMITE! 

I keep hoping I will magically drum up the courage to make Nutritional Yeast 'cheese' sauce, but somehow I just keep forgetting.  I know it is all the rage in vegan cheese sub-in's but I am a little scared.  Mostly because its called nutritional yeast. I mean, really.  The name's a little rough.  Even so, its delicious on popcorn, so it must be delicious on garbs, right? 

Because of the shear volume of consumption of these around here, I always make these from dry beans, but you can use canned beans if you want, just try for a lesser sodium brand and start in step 2.

Roasted Garbanzo Beans (preheat oven to 425)
  • 1lb dry garbanzo beans or 2 cans, drained and rinsed
  • 2-4tbls olive oil (use how much you want or are comfortable with, I just drizzle it out of my bottle and coat the garbs)
  • ~1/2tsp salt
  • ~1/4tsp freshly ground pepper
  • ~1/4cup Nutritional Yeast
Directions
1. Toss your dry garbs in a pot of water with at least 3 inches water over the top of the beans and bring to boil, then simmer gently for about 2 hours, then drain. 

2. In small/medium bowl, toss the garbanzos with the oil, then add the S, P and NY.  Spread the beans in a single layer out on a cookie sheet and roast approximately 25-35 minutes, stirring and flipping them every 10  minutes or so.  They should generally be firmly chewy when done.  I like it when I occasionally over cook a batch and have garbanzo nuts, but Mike and I differ there...

* You could very easily make these and a batch of Chocolate Chip Blondies and be set with a delicious power snack combo.


Monday, January 21, 2013

Peanut Butter Banana Chocolate Chip Muffins (Gluten-free/Dairy-free)

These super tasty muffins and packed with great sustaining protein and fats making them a perfect quick breakfast.  Also they ridiculously easy to make!  Even my peanut butter loathing daughter thinks they are delish.  However, after the first bite of the first batch, she and Mike bit into their muffs and immediately made haste to the kitchen to manually apply chocolate chips.  Clearly they were correct in their assessment and thus, this recipe strongly suggests the chip application.  Also, in the first batch I made, instead of 2 bananas, I used one banana and about 3/4c left-over cooked oatmeal from these muffins made last week.  I liked them that way, but most of you will enjoy more banana I suppose.  I also like to add a couple of tablespoons of ground flax for lots of reasons- great nutrition, fiber and such- but also flax and psyllium husk are great additions to gluten-free baked goods as they help with the binding that gluten otherwise provides as well as help bind in moisture.  Your option to add or not, they are fine either way.

Ingredients:
  • 1c Peanut butter (Natural)
  • 4 lg eggs
  • 2 bananas (see note above)
  • 1/4c maple syrup
  • 2 tsp vanilla extract
  • 6 Tbsp coconut flour (really any flour should work)
  • 3/4 tsp baking soda
  • 1/2 tsp salt
  • 1/4 cup mini chocolate chips
  • (optional) 2T ground flax seeds/psyllium husk 
Directions:
Preheat oven to 350.  Blend all ingredients except chips in food processor until smooth.  Mix in chips, then divide evenly between 12 muffin tins and cook for ~25 minutes, until toothpick comes out clean.

Enjoy! 


Sunday, July 15, 2012

Honey Lemon Raspberry Jam (low-sugar)


I haven't made jam in several years, but am delighted to say I made a tasty batch tonight!  I remember the first time I made jam years ago being shocked that the recipes I looked at called for more sugar than berries!  Back then I found a Pectin product (Sure-Jel maybe?) that allowed for low-sugar recipes and it has worked well for me over the years.  Yesterday I went looking on the web for low-sugar raspberry jam recipes and found that Pomona's Universal Pectin is all the rage and pretty much seems to be the new gold standard of low-sugar/no-sugar jam recipes.  I was highly skeptical I would find it, but sure enough it was at the local QFC when I looked for it!  Tonight I made a small batch of jam from some berries picked from Auntie Bert's crop and was a little short on numbers, so I augmented with some organic strawberries I had in the fridge.  I think it came out dynamite and am just not sure if it will get more use on toast or vanilla ice cream.....

I am going to put up my recipe that I used for this batch tonight, but link to another website that I thought gave excellent instructions on how to make the jam and what you need to get prepared.

Some jamming MacGyver notes: I don't have a jam funnel, so I made one up of rolled up tin foil with a wide mouth to fit in the jam jar.  Worked great!  Furthermore, I don't have any actual canning pots so I fill my deepest pot of water and line the bottom with the tops of my box grater!  Any metal thing will to that keeps some space between the bottom of the pot and your jars so they don't get too hot.

Honey Lemon Raspberry Jam
  • 4 cups mashed berries
  • 1/2-3/4 cup honey (my berries were pretty tart to start, so I went with 3/4)
  • 2-3 tsp fresh lemon juice\
  • 2 tsp pectin powder
  • 2 tsp calcium water
  • A boiling pot of water or canner (see note above)
Directions
Please link to this page on the Foods For Long Life blog for great directions!

Tuesday, June 12, 2012

Chicken Marbella (Gluten-Free/Dairy-Free)


I ate this dish about 7 years ago when it was made for a party for my mom and have truly been thinking about it ever since.  I can NOT believe I have waited this long, as it is unbelievably simple, easy and fast.  The ingredient list is totally bizarre but comes together in the most balanced way.  As a saltaholic, I felt it needed a bit of salt in the end, but that is me.  I will add some salt and pepper to the marinade next time I make it, or some extra olives or something, but otherwise it was dynamite.  It would easily lend itself to doubling or tripling to make ahead for a super easy party dish.  Also, if you like dark meat, you could use thighs here vs. breasts, but I think that is crazy. 

This truly would take any typical person 15 minutes to prepare ahead, but it took me 25 due to the extensive degiblification process I undertake with all chicken wherein I remove every tiny bit of fascia, tendon, fat, 'rib meat' and that nasty little artery that runs through every chicken breast.  Another bonus for those of my people who find preparing meat a deeply disturbing process is the fact that the preparation and actual consumption of this meal take place many, many hours apart. 

Recipe
  • 4 chicken breasts, cut in half width-wise, about 2-1/2 pounds
  • 1/2 cup prunes, halved
  • 1/2 cup Spanish green olives, halved
  • 1/4 cup red wine vinegar
  • 4-6 medium garlic cloves, finely minced
  • 1/4 cup olive oil
  • 1Tblsp dried oregano
  • 1/4 cup capers, with some brine
  • 2 bay leaves
  • 1/4 cup low sodium chicken broth
  • 1/2 cup dry white wine
  • 1/4 cup (scant) brown sugar

  • Cooked rice for serving
Directions
1. Combine all but wine & sugar (and rice) and let sit to marinate at least 3 hours, but preferably 8-24 hours.

2. When ready to cook, preheat oven to 350deg, then place chicken in a single layer in a glass baking dish, then spoon all of the rest of the marinade around in in the pan.

3. Sprinkle a pinch of brown sugar on the top of each piece of chicken and pour the wine around the chicken in the pan and cook uncovered for 50-60 minutes (til chicken is cooked through), basting the chicken with the pan juices periodically.

4. Scoop chicken, prunes and olives over rice and make sure to cover with the pan sauce and capers. 


Adapted from The Silver Palate Cookbook

Wednesday, April 18, 2012

Seabrook Sangria


We had the pleasure of spending Easter with The Cousins.  Actually, we spent it with most of  Mike's family, but to Mia, it is all about The Cousins.  It was a great weekend to be at the beach in the Great Northwest and this year we were in Seabrook, Washington.  This festive libation came out quite well to accompany an amazing meal made by my wonderful Sister-in-law and her husband (not sure if that makes him my brother-in-law? Doesn't seem quite right).  Anyway, I  had to prove to myself that it really was that good by making another vat of it last weekend in celebration of a good friend's birthday.  Indeed, it was dynamite, although the first batch was better by a tiny tad- I think the difference was that I used Newman's Virgin Lemonade in #1 and Trader Joe's Pomegranate Lemonade in #2.  To be fair, I added a bit of suggested cinnamon to the second batch, but I think that gave it some added dimension vs. not.  I'm thinking that the next time, I will skip the ground cinnamon and add a cinnamon stick or two into the pot while it is steeping together instead.  I'm pretty sure it was the lemonade that took a half-point off the second batch.

I also had a rare moment of brilliance and took a shallow dish (maybe a 2-3 cup Pyrex or so) and froze it full of lemonade to add in at the end when I set it out to serve- this way it would stay cold and sangrilicous without getting diluted.  And incidentally, this saves pretty well in a mason jar for up to 2 days in case you want to keep the party going when the guests are gone. 

Seabrook Sangria
  • 2 bottles of full bodied red wine, fancy not needed (I like Big House Red)
  • 1/2 cup sugar made into simple syrup (see below)
  • 4-6oz. Triple Sec
  • 6-8oz. Lemonade, plus more for freezing (see above)
  • Juice of:
    • 3 limes
    • 2 lemons
    • 1orange (2 might be nice)
  • 1 bottle sparkling wine, chilled (not the sweet kind)
  • (optional)  1/4tsp ground cinnamon or a couple of cinn sticks
  • (optional) misc chopped fruit such as pineapple, strawberries and such
Directions
1.  to make simple syrup, pour your sugar into a jar, cup or other vessel and slowly add hot water into it and stir- just enough to dissolve the sugar - maybe 4 oz or so? 

2.  Mix all ingredients except sparkling wine together in large pitcher or such item and place in fridge for maybe 4-8 hours

3.  When ready to serve, taste and adjust with a bit lemonade, juice and such to your preference, then add in the bottle of sparkling wine and frozen lemonade, then serve over ice with a bendy straw.

Thursday, March 15, 2012

Oatmeal Raisin Breakfast Cookies (Gluten-free/Dairy-free)

So these are basically granola bar drops or something.  They will pass as a cookie if they have to (say, if you are trying to get healthy food into your kids *ahem*) but they really are a nutritional snack (and therefore totally OK to eat if, say,  you have given up sweets and treats for Lent as some folks I know).  They are ridiculously easy to make,  totally packable and a great bite to keep you going in a pinch.  The 'recipe' below is absolutely just a suggested combination of ingredients. I would certainly encourage you to add nuts if you like, add dried cranberries, coconut, whatever. Clearly, the above batch was greatly helped by Mia this morning who felt strongly about having goldfish, O's and Honey Sunshine included.  I was just happy they didn't burn, but can't possibly imagine how unpleasantly soggy those fish will be tomorrow. 

I typically just literally pile everything into my 2c wet measuring cup, just adding stuff as I go- start with the applesauce, add peanut butter, then just dump it all in after that, adjusting the oats or whatever I choose to plop into them as I see fit to have the mix the consistency I like.  I am not one who likes much moisture in my foods, so I tend to put more oats and such in to keep them dry and cook them a long time.  If you prefer a more moistureful item, go a little scant on the oats and take them out a few minutes earlier.  I actually tend to keep them out on the counter uncovered to dry and stale out a bit.  I have issues.

Oatmeal Raisin Breakfast Cookies
  • 1/2c unsweetened applesauce (our mix of applesauce, mashed banana &/or squash puree is good, too)
  • 1/4c nut butter of your liking
  • 1/4tsp cinnamon
  • 1/2tsp vanilla
  • 1/8tsp salt
  • 1Tbls sugar, agave or maple syrup
  • 3T raisins (I greatly prefer currants here)
  • 3/4-1cup whole oats
  • 2-3Tbls mini chocolate chips (optional, but really....)
Directions (preheat oven to 350deg)
As I said above, I just dump all of the ingredients into a 2c measuring pitcher and mix.  I would mix the nut butter and and applesauce first to get it well combined, then add the rest and adjust to your taste.  Then drop in 1oz/1Tbls blobs on a parchment lined cookie sheet and cook 18-20 minutes.  Let cool a few minutes before transferring to wire rack to cool.

Adapted from this recipe at Chocolate Covered Katie.

Tuesday, December 20, 2011

Gingerbread Cut-outs (Wheat-free/Dairy-Free)


Gingerbread cookies are my absolute favorite.  I have never made them before this year because I am almost blinded with resentment of the refrigeration step.  This process is so ridiculous, so heinous, that I simply have never made them.  There is just something about thinking "mmm, I'm going to make some cookies" and "Oh, wait, let's not even think about eating them until tomorrow" that is ... well, you get it.  Anyway, this year I have had an attitude adjustment called 'raising a toddler'.  In this complicated step of life, one reevaluates what one defines as fun and thinks "hey, that might be fun to make them at night and then we can cut them out tomorrow!" in addition to many other redefining moments, of course.  Plus, I clearly under use my Kitchen Aid mixer, as this machine basically makes cookies on its own with a bit of coaching.  All of these years.  Anyway, I was right.  It was totally fun to cut them out and play with Mia doing the cookies once I got through the rolling out process which nearly broke me- but only because I skipped that silly step of rolling it out before refrigerating it.  Incidentally, I don't recommend you skip that step.

So this recipe was adapted from a recipe in The Allergen-Free Baker's Handbook (yes, I adapted a perfectly good GF recipe and added gluten), so you could easily replace the spelt flours with your favorite GF flour and 1tsp xanthan gum if you like.  These cookies have great flavor, are super soft with a just-right chew and were exactly what I wanted, especially since this was  my first foray into baking with spelt.  Good stuff.  Low sugar, much lower in fat than typical cookies and great ingredients with the whole grain flour and molasses make them right good mama/toddler snacks.

Spelt Gingerbread Cut-out Cookies
  • 3-3/4c Spelt flour (I used 2c reg and 1.75c white spelt)
  • 3/4 tsp baking soda
  • 1 tsp salt
  • 1 Tbls ground cinnamon
  • 1 Tbls ground ginger
  • 1 Tbls ground cloves
  • 1/2 c vegetable shortening, cut into about 8 pieces
  • 1/2 unsweetened applesauce
  • 1/2 light agave nectar
  • 1/4c plus 2Tbls molasses
Directions
1.  In the bowl of a stand mixer fitted with a paddle attachment, combine the flour mix, baking soda, salt, cinnamon, ginger and cloves.  Mix on low speed until combined, about 30 sec.  Stop the mixer and add the bits of shortening and the applesauce, then mix on low speed for about 1-1/2 minutes or until consistency of fine meal.

2.  With the mixer still running, add the agave and molasses, mixing until thoroughly combined, about 20 more seconds.  (if you use a food processor instead, add ingredients in order mentioned, process for about 10 seconds per step)

3.  Lay out two large sheets of parchment paper on your work surface.  Using spatula, divide the dough evenly between the two sheets.  Cover each with another large parchment sheet and roll out with rolling pin until ~1/4" thick.
4.  Wrap in plastic and transfer the dough in the parchment paper to the fridge until completely chilled, preferably overnight or at least a few hours. 

5.  Preheat oven to 350.  Line two baking sheets with parchment paper.

6.  Remove one dough from the fridge and peel back one sheet of parchment paper, then replace it and flip the dough over.   Remove the new top sheet of parchment paper and start cutting shapes!

7.  Transfer cut shapes onto baking sheet about 1" apart and bake on center rack for ~10 minutes.  If you like, you can use raisins and such before baking to decorate.

8.  Save all scraps around your cut-outs and re-roll for more cookies as many times as you like.

9.  Let cookies cool completely if you plan to decorate with your favorite frosting.

Makes about 3 dozen cookies of mixed sizes.  A pretty big batch if you ask me.


This video was made while making some GF snickerdoodles to post another time, but is clearly an excellent alternative mixing method.

Tuesday, August 2, 2011

No-Bake Oatmeal Cookie Balls (Gluten-free/Dairy-free)


These are tasty little numbers adapted from a recipe given to me by Mia's Naturopath, Dr. Molly Gray.  We love her and everyone else we have seen at their clinic.  Dr. Gray has been especially amazing in how she treats Mia like a full human and makes her visit there extremely positive and cooperative, vs. doing things to her whether Mia wants them or not.

So these were supposed to be a yummy treat that Mia would love to eat and just pack her with nutrients and such, but it turns out she wasn't into them.  Toddlers, right?  But me?  I absolutely loved them!  Being the food enthusiast/Physical Therapist that I am, I brought them to work and shared them with my colleague and about half of my patients and unanimously we all agreed that they were amazing!  To borrow from Cooks Magazine: "Tasters referred to them as 'delicious', 'abundently satisfying' and 'just right, such that you eat one and are completely sated'".  Really, try them for yourself if you have an extra 3 minutes to spare.  That is all it will take.  Bonus, these are the kind of thing that you could put just about anything into and in fact, I used the little bits of about 4 different types of nuts and trail mixes just to clean the cupboard. 

Oatmeal No-Bake Cookie Balls
  • 1 cup whole oats (use certified gluten-free if needed)
  • 1c mixed nuts (I used salted pumpkin seeds, walnuts, pecans and pine nuts)
  • 4 dates, pitted
  • 1/2-1 tsp pure vanilla extract
  • 2-3 Tbls pure maple syrup
Directions
1) in food processor or blender, blend up the oats and nuts until they are finely chopped; add dates and blend until they are also finely chopped.

2) add vanilla and 2T syrup and pulse a few times to combine.  This will still be very coarse in presentation (see photo below).  Add more syrup as you see fit.

3) scoop up small hand fulls and smash into balls.

Pulsed without vanilla or maple syrup

with the vanilla and maple
 
too beautiful not to add a picture of them!  Reminds me of working on a Kibbutz many moons ago....

scoop up a handful....
and smash it into a ball!


Enjoy!!

    Thursday, June 23, 2011

    Mango Banana Recovery Ice Cream (Dairy Free)


    Are you running in the Rock & Roll Half/Full Marathon this weekend in Seattle?  If so, please do consider this as quite possibly the BEST recovery snack to have in your first 30 minutes after running to replenish your depleted nutritional resources.  Seriously, this is perhaps the most perfect post-race food and totally delightful at the same time. 

    Not to mention the fun for me of finally talking my daughter into the fact that ice cream is delicious and fun, even though it is cold.  Hard to be ice cream without the cold part.  Anyway, now she is totally into it and I can take heart in the fact that this ice cream is full of fresh fruit and calcium rich almond milk and juice.  That's it!  Also, feel free to play with the fruit and juice you toss in to work with whatever is in your freezer.

    Of course this is good for an everyday ice cream treat as well!

    Mango Banana Recovery Ice Cream

    1 banana, frozen in pieces
    3/4 cup or so frozen mango pieces
    2-4 Tbls Almond milk (or any other milk-type... rice, soy, cow....)
    2-4 Tbls Orange Juice (optional)

    Directions:

    In high powered blender or food processor, toss in the banana and mango, then add a few tablespoons of  almond milk (I just put in a long drizzle).  Start the blender or food processor going and slowly add a tablespoon (or glug) at a time of milk and/or juice.  Use more milk to make it ice creamier and more juice to make it creamsickle-ey-er.  Then scoop it into your favorite delivery item.  Mia is a fan of the cone and they make perfectly good gluten-free cones to be had at any grocery store these days.  Or any other cone, or cup, or cookie....

    Makes about 3 good sized servings.  I recommend immediate consumption for a good soft texture, but it does freeze well for later eating if for some unrecognizable reason you can't finish it all.

    Beautifully smooth!

    Can you argue with that?

    Monday, June 6, 2011

    Chocolate Chip Blondies (Gluten-free/Dairy-Free)


    I was quite intrigued when I stumbled on this recipe the other day.  It looked tasty, but garbanzo beans?  Yes! I have been amazed at how delicious these are and how versatile.  The original recipe doesn't have oats in them and I found them to be a bit too Japanese-bean-cake-like for what I was going for, so I have added in oats along with a few other minor changes and like what they bring, although the day after I made the first batch, they were a much better texture.  The oats allow for immediate enjoyment, however.  And this is FAST!  I can have the batter made before the oven preheats.  Doesn't even cut into precious nap time barely at all.  Furthermore, this is the only way I can sneak peanut butter into the wee one and just about the only source of protein she eats anymore. 

     Chocolate Chip Blondies
    • 1 1/2 cups garbanzo beans (1 can, drained and rinsed)
    • 3/4 tsp baking powder
    • 1/8 tsp baking soda
    • heaping 1/8 tsp salt
    • 2/3 cup brown sugar* (less if you like, even Mia thinks 1/3-1/2c is fine)
    • 1 tsp vanilla extract
    • 3 or so Tbls ground flax (optional but great for nutrition and texture)
    • 1/4 cup peanut butter (or other oil or soft butter if not using nut butter)
    • 1/4-1/3 cup chocolate chips ( I use mini chips because they go further)
    • handful of oats (maybe ~1/4cup?) 
    • splash of milk (I use almond milk.  love it) Maybe 2-4 Tbls?  See below
    *coconut sugar works well in these as does raw sugar and the like
     
    Directions

    Preheat oven to 375 degrees. Blend all ingredients except chips and oats until very smooth- I have used both a blender and a food processor.  Add the (almond) milk a small splash at a time into the blender to ease the mixing and lesson the chance of busting your blender (or your host's blender as the case may be).  Mix in chips and oats, and scoop into a greased or parchment lined 8×8 pan. Bake for 33-35 minutes.  I find that in the batches that I add oats to, the cooking time is on the shorter end.  Without the oats, they stay quite a bit gooey-er and need the longer end.  They will be super gooey when they first come out, but will firm up, so don't be tempted to overcook them!

    (Note for amended recipe with milk: I find this really helps reduce the excessive gooey-ness, yets keeps it modestly moistureful).
    Why wouldn't you just mix the oats and chips in the pan?


    And why not a double batch?

    Adapted from this recipe by "Chocolate Covered Katie"

    Tuesday, March 15, 2011

    Simple Split Pea Soup

    We recently spent the weekend enjoying copious amounts of indulgent, delicious food and (plenty of) drinks while celebrating a friend's wedding here in town.  On the heels of such debauchery, a simple meal was required.  The following 'recipe' is really just a simple way to put together a few ingredients that are easily stored in the kitchen for a quick, healthy and filling meal. 

    In addition, this makes an excellent Friday meal for those observing Lent....

    Ingredients:
    • 1tbls olive oil
    • 1 medium shallot or small onion, finely chopped
    • 1 medium garlic clove, minced
    • 2 cups split peas, rinsed and picked over
    • 4-6 cups of water or low-sodium chicken or vegetable stock
    • ~1 tsp salt, divided
    • ~1 tsp freshly ground pepper, divided
    Directions:
    1. In large pot over medium-high, heat olive oil and add the shallot or onion with about 1/2tsp salt and 1/2tsp pepper. Saute until transparent, about 5 minutes.  Then add the garlic and saute for a minute or so more.
    2.  Add the split peas and 4 cups of the water or stock, and bring to a boil.  Once boiling, reduce heat, cover and simmer for about 45 minutes, stirring periodically.  You may need to add additional water/stock if the peas absorb it too much.
    3.  Once cooked, adjust the flavor with salt and pepper to taste and adjust the consistency with additional stock or water as you like. 

    Serve with a good crusty bread (try this one) and if you like, sprinkle with pecorino or parmesan.  Also, I often make it very thick so we can scoop it over a bowl of rice.  Yum!
    Shallots here.  I prefer them for their sweeter and more delicate flavor vs. the mighty onion.

    Ready!

    Wednesday, January 12, 2011

    Cream Biscuits & Buttermilk Biscuits (Gluten-Free/Adaptable & Dairy-Free Adaptable)

    I have been making lots of biscuits lately.  I have been craving Chicken Pot Pie and wanting to get the biscuits right before pulling it off.  Also, they are super fun to make with Mia.  She loves to pat them down and smush them and mix them and fling them around.  Somehow she also discovered that the dough is delicious and now I have to restrain her from eating them all raw.

    Anyway, these are easy to make, reduced in fat from the typical biscuit, fast, tasty and easily modified for the Gluten-Free or Dairy-Free eater.  So many reasons to make delicious biscuits tonight!  I'd say start-to-finish-in-my-mouth 30-40 minutes depending on how much help I get.

    They are great plain or with butter and jam, honey or agave- or maybe make a breakfast sandwich with eggs and ham? yes!


    Buttermilk* Biscuits: (Adapted from The America's Test Kitchen Family Edition)

    Ingredients:
    *A great way to sub for buttermilk is to use 1c milk mixed with 1t white vinegar and let stand for 5 minutes until thickened.  In my case, to avoid the dairy, I have used soy milk, 'whole grain drink', MimicCream and others.  All work great!

     Directions:

    1.  Adjust oven rack to middle position and heat to 450.
    2. Whisk flour, baking powder, baking soda and salt together in large bowl.
    3. In separate bowl, whisk melted butter and buttermilk* together
    4. Gently stir the buttermilk mixture into the dry ingredients and mix with spatula until just combined (do not over mix or biqs will get tough and the absolute opposite of flaky)
    5. Gently roll out or pat out on floured surface until about 3/4" thick
    6. With 2-1/2"biscuit cutter or upside-down cup, cut out biscuits and place on parchment lined baking sheet for 11-13 minutes, until golden brown.


    Cream* Biscuits(Adapted from The America's Test Kitchen Family Edition)
    Now, these are even faster and equally tasty!

    Ingredients:
      Directions:

    1.  Adjust oven rack to middle position and heat to 450.
    2. Whisk flour, baking powder, sugar and salt together in large bowl.
    3. Stir in cream until dough forms, about 30s.
    4. Gently roll out or pat out on floured surface until about 3/4" thick
    5. With 2-1/2"biscuit cutter or upside-down cup, cut out biscuits and place on parchment lined baking sheet for 11-13 minutes, until golden brown.


    MimicCream

    A great Dairy/Cream substitute for baking, cooking coffee!  Made with nuts and other Delicious goodness, this is a great allergen-free kitchen booster.

    Monday, December 13, 2010

    Chewy Granola Bars - Gluten-free (naturally)/Dairy-free

    This is very fast, easy to make and couldn't possibly be more versatile or flexible.  Every time I make this, I tell my good friend, Bert "I made bars again, I think these are my best yet".  They are always different based on what I have on  hand and I benefit from the difference each time.  The inspiration for these came even before going the gluten/dairy free route for me.  As a new mom, I found that it was hard for me to find good, healthy and fulfilling snacks to keep me going during the day without eating just junk or not eating at all.  If you aren't in need of dairy-free, the other version is ridiculously amazing and I will post it next.  This version is super tasty, but more healthy tasting, too. Truly, there is no need to be precise with the ingredients or amounts, as long as it is gooey as a batter and sticks together.  What I put down here is what I currently have been enjoying, but it will change next time.... These last for ages, too.  Also, one time I made them and decided the next day that they were too gooey so I cooked them again and it worked great!  Really, these can't messed up.


    Ingredients
    • 2c Rolled oats, gluten-free if needed (I prefer the chewiness of regular, quick are also delicious)
    • 1c Toasted brown rice cereal (totally optional, but good for texture variation and lightens it up)
    • 1-2c mixed dried fruit (I just use currants and keep it to 1c since I don't like things too sweet)
    • 2c mixed chopped nuts (I like a mix of blanched almonds, pine nuts, pecans, cashews & soy nuts)
    • 1/2-1tsp salt (again, totally optional, but I like a more savory flavor.  You could use some salty nuts as well- yum!
    • 1/2c natural peanut butter
    • 1/2c unsweetened apple sauce
    • 1/3c low-sugar jam or preserves

    Directions:
    Preheat oven to 350.

    Line a 9x9 pan with parchment paper and grease or spray with non-stick spray.  If you are adding lots of nuts and rice cereal, maybe you will need a 9x13 pan.

    In large bowl, mix the dry ingredients. In smaller bowl or in a large measuring cup, mix the wet ingredients well.  Pour the wet into the dry and mix together.

    Pour the mix into your prepared pan and pat down- they should be maybe 1-2 inches thick.  Cook for ~30 minutes, 'til browned around sides and top.  It may still seem a bit gooey.

    Let cool in pan ~10  minutes before transfering to cooling rack and cooling completely.  Cut them into 12-16 squares as you like.

    gooey into the pan!
    Just done

    The corner is the best part!

    Monday, November 22, 2010

    Oatmeal Apple Crisp (Wheat-free/Dairy-Free/adaptable)

    Grandma Jeanne's Best Apple Crisp


    This is a cheater post, since I put this recipe up two months ago.  I thought it wasn't a bad idea to re-post it with Thanksgiving is upon us and folks working out the menus and such.  Everytime my Mom makes this she gets recipe requests- and for good reason! 

    GF note: I have never made it with gluten-free flour, but you certainly could if you know your flour mixes and xanthan gums.  I am still working my way around baking in the gluten-free world, so I't not ready to say how best to adapt it there.

    Enjoy and Happy Thanksgiving!

    Tuesday, November 16, 2010

    Chicken Parmesean (Pecorino) Gluten-free/Egg-free/Dairy-free Adaptable

    This is a surprisingly fast dish to prepare and very tasty, it just takes several dishes for the assembly line.  Kind of a comfort-meets-fancy dinner but very easy.  I often freeze half of it and it holds up surprisingly well if maintained in a good air-tight freezer container, then thawed for 1-2d in the fridge before cooking.

    (serves about 4 bigs and 2 littles and nobody goes hungry)
    Ingredients:
    • 4 chicken breasts cut in half lengthwise (these will be even better if they are pounded flat, however in my house, the time just isnt there, so I skip that part)
    • 1/2c seasoned breadcrumbs (or just add a pinch each of dried basil/oregano/lemon pepper to plain crumbs if you have plain crumbs at the ready)
    • 1/4c grated pecorino or parmesean cheese
    • 2-4T flaxseed meal
    • 2t olive oil
    • 1/4c milk, buttermilk, soy milk, rice milk or 2 eggwhites lightly beaten
    • 4c tomato sauce, heated
    • 1-2c shredded cheese (Use what you like here.... Mozzarella is standard, Jack is great, any non-dairy meltable cheese works- I used Goat Gouda from TJ's and it was fab)

    Directions:
    Preheat oven to 425.
    1. Combine breadcrumbs and pecorino, then put into a shallow dish.
    2. Put the flaxmeal and milk each in separate shallow dishes or a plate.
    3. Dredge one chicken breast in flax meal, then dip in milk or egg, then dredge in breadcrumb mixture.  Repeat with remaining breasts.
    4. Heat oil in large nonstick skillet over medium-high heat.  Add chicken and cook about 5 minutes on each side until done or nearly done.
    5. Place each breast in 9x13 slightly oiled glass baking dish.
    6. Cover them with tomato sauce and top with cheese.
    7. Bake for 10 minutes or just until cheese melts and sauce is a little bubbly.

    This is Flaxmeal on the top and the Breadcrumb/Pecorino mix on bottom.

    Browning up!
    This was some Roasted Tomato Sauce from our freezer- straight into the pan and ready for dinner!
     
    Delicious served with or over noodles!  In our case, I just tossed some Trader Joe's Brown Rice Spaghetti noodles with olive oil, salt & pepper.
     
    
    Mom's portion
    
    Mia'a portion!
    We ate this with the Raw Tuscan Kale Salad that I can't seem to get enough of.  Great meal!