Tasty and mostly simple food for the whole family.

Tasty, healthy, simple, verstile, practical, seasonal, fun food for all to enjoy. I will endeavour to make things gluten-free, dairy-free (cow's milk only here, I'm not super-human), and low sugar as able. I hope others feel motivated to add their recipes to this collection so we can all try them. Thank you!

Friday, May 27, 2011

Mediterranean Quinoa (Gluten-free)

This is a quick, healthy and delicious dish.  It comes together in a pinch and most kitchens will have the ingredients on hand to pull it together easily any night, especially if you keep pesto around like I do. If you don't have it in your kitchen, use what you have and I bet it will be great.  It makes a great potluck dish and is easily doubled or tripled for big gatherings.  It is delicious cold the next day if it makes it that far.

This is the dish that made me fall in love with quinoa.  I am not one to mix sweet and savory typically, but this recipe is perfectly balanced in that way.  Furthermore, I am always wanting to reduce the added oils and such to recipes, but I wouldn't touch it here.  Somehow the olive oil, herbs, feta and currants are just perfectly matched.  The currants make the just right tiny sweetness.  I am just too lazy to chop herbs, so I always use whatever pesto I have on hand in the freezer or fridge.

Mediterranean Quinoa (total time 25-30 minutes)
  • 1cup quinoa
  • 13/4cups water
  • 1/2tsp salt
  • 1/4cup pine nuts, toasted (or almonds, pecans, etc)
  • 1/4cup olive oil
  • 1/4cup lemon juice
  • 3-4Tbls chopped fresh basil, Italian parsley &/or cilantro (I use about 2T cilantro pesto or parsley pesto and 2T basil/spinach pesto)
  • 1/4cup currants (you can use chopped raisins if you like)
  • 1/3cup feta cheese, crumbled
Directions
In 2-quart pot, add water and salt and bring to a boil.  Add quinoa to pot and reduce heat to low, simmer 20 minutes.  Once cooked, turn off heat, take off lid and let rest 5-10 minutes.

Meanwhile, dry-toast pine nuts in skillet on the stove for a few minutes until golden brown.  In medium bowl, combine olive oil, lemon juice and herbs or pesto.  Add currants, pine nuts and feta cheese.  Add warm quinoa to bowl and toss gently.  Serve at room temperature.

Adapted from Feeding the Whole Family by Cynthia Lair

Tuesday, May 10, 2011

Giant Quinoa Tamale (Gluten-Free/Dairy Adaptable)

When I saw a recipe for Quinoa Tamales a few days ago, I just about lost my mind.  I seriously love tamales.  I am highly reactive to corn and have not had the pleasure of enjoying it for a while now, despite the fact that my neighbor actually makes tamales fresh each day for sale in her taco truck.  I am not sure how I ended up waiting three days to make it, but I do know that Mike and I barely spoke when we were eating it yesterday until we agreed at the end of the meal that I would make it again today.  Again we finished it and again it was delicious.

Like all things Fawnalicious, think of this as highly modifiable.  Really this is a recipe for using Quinoa as a base to put stuff into.  I put shredded chicken in ours, but you could put roasted vegetables or beans or carnitas, or ground/shredded beef...etc into it.  It is very easy and low maintenance to make.  It takes a while to make start-to-finish, but it is nearly all unattended.  

The original recipe (posted by the fabulous Mark Bittman) included what is no doubt an amazing recipe for tomatillo salsa.  I didn't have the motivation to make it, so I used  about 1cup of Trader Joe's salsa verde and mixed it with 2-3T cilantro and parsley pesto

Quinoa Tamales
  • 2 Cups quinoa, rinsed and drained
  • 5-6 cups water
  • 1-2 tablespoons olive oil, plus more for greasing the loaf pan
  • Salt
  • 1⁄2 teaspoon baking powder
  • 1-2 cups cheese ( I like it cheesy)- In this house, Sheep’s milk Feta rules and it is no sloppy second.  You could also use crumbled queso fresco or grated Monterey Jack or whatever you like
  • 1 tablespoon chili powder (optional- I skipped it)
  • ½ cup chopped fresh cilantro or some cilantro pesto- for garnish
Directions
1. Heat the oven to 400°F.  Meanwhile, put the quinoa in a large pot along with a big pinch of salt. Add the water 1 cup at a time, to cover by about 11⁄2 inches.  Bring to a boil, then adjust the heat so the mixture bubbles gently. Cover and cook, stirring occasionally, until the grains are very tender, 25 to 30 minutes- until the water is just barely absorbed, it should pretty mushy. If the grains get too dry, add just enough water to keep them submerged. When the grains are starchy and thick, remove from the heat. (You can cook the quinoa up to a day ahead and refrigerate; return to room temperature before proceeding.)

2.When you’re ready to make the tamale, generously grease two 9 × 5-inch loaf pans or one loaf pan and one 9x9-inch square with some oil. Mix the baking powder and a big pinch of salt into the quinoa with a fork (good to taste here and adjust salt). The consistency should be thick but spreadable; if it’s too stiff, add a few drops of water. Spread half of the quinoa mixture in the bottom of the pan and sprinkle with the cheese and chili powder if using. Add the remaining quinoa, smooth it out evenly, and press down a bit to seal the loaf. Cover the pan tightly with foil. (At this point the quinoa loaf can be covered and refrigerated for up to several hours.)

3. Bake the loaf for 30 minutes, then remove the foil and bake until the top is golden brown, another 30 minutes or so. Remove the pan from the oven and let the tamale sit for 10 minutes before turning it out onto a platter (or just serve from the pan). Garnish with the /pesto and a little more cheese, cut the tamale big into slices, and serve, passing salsa at the table.

The first night, I actually made only a half- batch and used half feta and half cheddar.  Feta was the clear winner, so I didn't bother with anything else the next night.  I just layered chicken on top of this layer to stuff it a bit more.  yum!


Thursday, April 14, 2011

Maple Syrup Oat Scones (Gluten-Free/Adaptable)

I saw this scone recipe a few weeks ago on the Smitten Kitchen website and pretty much rushed out and made them that day.  I have only made my gluten-free adaptation, but I imagine the original version as she posted was amazing as well.  The only downfall of the gluten-free version is that they don't rise as much, but anyone who eats gluten-free baked goods or bread knows this is the way it goes.  Also, I have this need to always cut some of the butter or oil from most of the baked goods I eat, so this also likely affected the fluff factor, as my version cut 1/3 of the fat.  Furthermore, I am constantly playing with different flours to increase the protein and nutrient value, so a simpler flour mix may also be lighter.  You choose!

We ate every last scone in an 18-hour period and I have just been too busy to make them again, or I would have made them a few more times since.  Mia loved them and not just because we had "scones for dinner" that night.  These will surely make a great addition to any Easter brunch or any regular breakfast (or dinner!) for that matter.

For the standard flour version, I will simply send you here for the original post that I adapted the following recipe from.

Gluten- free Maple Syrup Oat Scones (makes 8-10 scones)
  • 1 3/4 cups all-purpose gluten-free flour, plus extra for dusting surface (or see below for the combination I used)
  • 1/2 cup oat flour (see this recipe for how to make this flour if you don’t have it on hand, or use a different flour to substitute if you like)
  • 1/2 cup rolled oats
  • 1 very heaped tablespoon baking powder (very heaped)
  • 1 very heaped tablespoon granulated sugar
  • 1/2 teaspoon table salt
  • 3/4 cup (unsalted butter, cut into pieces (I used 1/2c butter and 1/4c applesauce)
  • 1/4 cup maple syrup
  • 1/4 cup milk or buttermilk (I used almond milk)
  • 1 egg, beaten (for glaze) (I skipped this because I forgot- no big deal)
(Fawn’s GF flour combo: 1/3c buckwheat flour, 2.3c Tom Sawyer’s flour, 1/4c brown rice flour, 1/4c crushed pecans, 1/4c garbanzo flour)

Directions:
1. Preheat your oven to 400°F. Butter a baking tray or line one with unbuttered parchment paper.

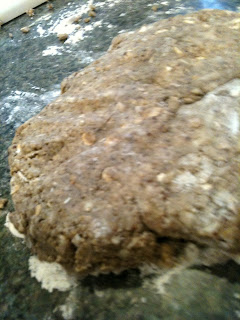
2. Whisk the flours, oats, baking powder, sugar and salt together in a large bowl. With a pastry blender or your fingertips, work the butter into the dry ingredients until the mixture resembles fine breadcrumbs. In a small dish, combine the milk and syrup, then add these liquid ingredients to the butter-flour mixture. By hand or with a rubber spatula, bring everything together to form a dough. If it feels too dry, add a little more milk but not enough that the dough is too, too sticky.  Remember that gluten-free baked goods will not have the same consistency of their gluten-full counterparts, so the dough will be much stickier here.

3. On a lightly floured surface, pat or roll the dough out until it is 1 1/4 inches (3 cm) tall. Using a 2-inch (5-cm) cutter, cut the dough into rounds and place them on the prepared tray so that they almost touch. Glaze the tops with beaten egg (or not)  and bake for 20 to 25 minutes until the scones are lightly golden.
"heaping"!
Just use a glass to cut the scones if you don't have a biscuit cutter.  Delicious!

Wednesday, March 30, 2011

Skillet Penne & Sausage Supper (Gluten-Free/Adaptable, Dairy-Free/Adaptable)

Time for some serious home cookin' here in the Great Northwest.  While our family did have one blissful week of sun and BBQ while watching spring baseball and talking endless Physical Therapy with good friends, we are back to what may be the rainiest six months ever in Seattle (somehow, rain just isn't as romantic when I can't leave the house on a whim with my snowboard anymore...).  Gratefully there is the kitchen and my beautiful 2-and-a half-year-old sidekick who is showing lots of interest in being in the kitchen with me. 

This has been one of my friends and my favorite easy meals for several years now and it just occurred to me the other day to adapt it for a gluten/dairy sensitive meal and enjoy it again.  I found that the brown rice pasta I used absorbed less stock than it's semolina cousin, so I would reduce it by a bit from the original next time.  I had to simmer it several minutes longer to absorb/evaporate the extra broth which left the pasta much softer than I would prefer, but Mike loved it ("It's almost like a stroganoff").  Gratefully he doesn't mind a mushy noodle, but I will change the ratio in the list below for others.  I hope you like it!  I further adapted it to suit what I had on hand in the kitchen and strongly encourage you to do the same as it is very forgivable and delicious.  Also, its fast!

Skillet Penne & Sausage Supper
  • 1 tbls Olive oil
  • 1 Onion minced (I skipped this, I didn't have one)
  • 1 lb. Chicken or Turkey sausage, casings removed
  • 3 medium Garlic cloves, minced
  • 1/2 C Oil-packed Sun-dried tomatoes, rinsed and chopped fine (canned diced tomatoes will sub in here fine if you don't have SD-toms on hand)
  • 8 oz penne (~2.5C) - I used Trader Joe's Brown Rice Penne
  • 2 C Low-sodium Chicken broth
  • 1/2C Heavy cream (I subbed MimicCream)
  • 5oz baby spinach leaves (I used dried wild mushrooms and peas instead tonight)
  • 1oz grated Parmesan or Pecorino (~1/2cup)
  • salt & pepper
Directions
1.  Heat oil over medium heat in deep sided 12" skillet until shimmering .  Add the onion if using and about 1/2tsp salt and cook until softened, about 5 minutes.
2.  Stir in the sausage and cook, breaking up the meat with a wooden spoon, until no longer pink, about 4-5 minutes.
3.  Stir in the garlic and cook until fragrant, about 30 seconds.  Sprinkle the tomatoes over the sausage.  If you are substituting something instead of the spinach, this is a great time to add it to the mix.  Pour the broth and cream or MimiCream over the pasta.  Cover and bring to a boil.  Reduce the heat to medium-low and continue to simmer, stirring occasionally, until the pasta is tender.  About 10 minutes for semolina pasta, or about 12-15 minutes for rice pasta.
4. Stir in the spinach a handful at a time and cook until wilted, about 2 minutes.  Stir in the Parmesan or Pecorino and season to  taste with salt & pepper.

I added a bit of broth to deglaze the pan before putting the pasta and such in because the bits on the pan are just too good to not scrape up into the sauce!

Tuesday, March 15, 2011

Simple Split Pea Soup

We recently spent the weekend enjoying copious amounts of indulgent, delicious food and (plenty of) drinks while celebrating a friend's wedding here in town.  On the heels of such debauchery, a simple meal was required.  The following 'recipe' is really just a simple way to put together a few ingredients that are easily stored in the kitchen for a quick, healthy and filling meal. 

In addition, this makes an excellent Friday meal for those observing Lent....

Ingredients:
  • 1tbls olive oil
  • 1 medium shallot or small onion, finely chopped
  • 1 medium garlic clove, minced
  • 2 cups split peas, rinsed and picked over
  • 4-6 cups of water or low-sodium chicken or vegetable stock
  • ~1 tsp salt, divided
  • ~1 tsp freshly ground pepper, divided
Directions:
1. In large pot over medium-high, heat olive oil and add the shallot or onion with about 1/2tsp salt and 1/2tsp pepper. Saute until transparent, about 5 minutes.  Then add the garlic and saute for a minute or so more.
2.  Add the split peas and 4 cups of the water or stock, and bring to a boil.  Once boiling, reduce heat, cover and simmer for about 45 minutes, stirring periodically.  You may need to add additional water/stock if the peas absorb it too much.
3.  Once cooked, adjust the flavor with salt and pepper to taste and adjust the consistency with additional stock or water as you like. 

Serve with a good crusty bread (try this one) and if you like, sprinkle with pecorino or parmesan.  Also, I often make it very thick so we can scoop it over a bowl of rice.  Yum!
Shallots here.  I prefer them for their sweeter and more delicate flavor vs. the mighty onion.

Ready!

Saturday, March 5, 2011

Oat Soda Bread (Gluten-Free Adaptable/Dairy-Free Adaptable)

People, this is NO APOLOGIES GLUTEN-FREE BREAD!  With crust and chew and no strange sponginess.  Gluten-free eaters will know what I am talking about.  I haven't even made the recipe with wheat flour because it is so dang tasty without.  I can only imagine that the gluten-full recipe is amazing, too, maybe even with spelt or rye as noted in the original recipe.  I have been making this for several weeks now and keep varying the gluten-free flours I use and they are all delicious in different ways.... use Tom Sawyer's flour for a more white, neutral flavor; use garbanzo &/or brown rice flour for a more substantial and round flavor with more protein; use quinoa and .....  you get the picture.  I think the next time I make it I will try it in part with my new favorite 'flour' of finely crushed pecans or almonds to make a good breakfast version.  Anyway, eat it plain with good salted butter, with jam, soup or the next day as a PB & J.  So good!  And very fast to make, too.  I strongly recommend making at least 4C worth of the oat flour, because you will want another loaf very soon and this  makes it even faster the next time.

Ingredients:
  • butter, to grease pan
  • 2 c rolled oats
  • 2 1/4C unbleached all-purpose flour*, plus more for dusting and kneading
  • 2tsp xanthan gum* (only if making gluten-free)
  • 1 3/4 tsp baking soda
  • 1/4 tsp fine-grain sea salt
  • 1 3/4 c buttermilk**, plus more if needed, and 2T. for brushing
  • mixed seeds - sesame, caraway, poppy, etc. (I like black and golden sesame seeds)

* If Tom Sawyer's Gluten-Free Flour here, it has the xanthan gum mixed in, otherwise you can substitute your favorite gluten-free flour mix and make sure it either has xanthan gum in it, or use approximately 1tsp Xanthan Gum:1cup flour.  Round down for partial cup measurements, for example here, use 2tsp Xanthan Gum with the 2-1/4c flour
** I made my own buttermilk as noted in this previous recipe for buttermilk biscuits, using 1-3/4c soy milk or almond milk with 1-3/4tsp white vinegar

Instructions:
1.Preheat the oven to 400°F with a rack in the middle of the oven. Butter and line a 9x5x3 inch loaf pan (or one with ~8 cup capacity) with parchment paper and set aside.
2. To make the oat flour, use a food processor to pulse the rolled oats a few times. Then process into a fine powder - another minute or two. If you are buying oat flour, not making your own, measure out a scant 2 cups. (skip this step if you have oat flour in your pantry already, I don't typically)
3. Sift the flours, baking soda, and salt into a large bowl. Make a well in the flour and pour in the buttermilk. Stir just until everything comes together into a dough. Turn out onto a lightly floured counter top and knead for 30 seconds or so, just long enough for the dough to come together into a cohesive, slightly flattened ball without many cracks or fissures. If your dough is on the dry side, add more buttermilk a small splash at a time.
4. Now ease the dough evenly into the prepared baking pan. Brush all over the top and sides with buttermilk and sprinkle generously with mixed seeds or flour, 2 tablespoons or so. Slice a few deep slashes across the top of the dough. Bake for about 30 minutes, then quickly (without letting all the hot air out of the oven), move the rack and the bread up a level, so the top of the bread gets nice and toasted. Bake for another 20 minutes, or until a hard crust forms and the bread is baked through. It will feel very solid and sound hollow when you knock on it. Carefully lift it out of the pan and allow to cool on a wire rack.

Oats in the food processor~
"buttermilk"- actually almond milk with vinegar in this batch. 

Yes!

Adapted from this recipe by Heidi Swanson.

Friday, February 25, 2011

Sunday Pancakes (Whole Wheat or Gluten-Free Quinoa/Buckwheat)

These are only Sunday Pancakes because I never think to make time for pancakes during the week.  They are, however, fast and easy to make so could very well be Everyday Pancakes.  Usually I make a full batch and freeze the leftovers so I can just pop them in the toaster and eat in a pinch during the week.  They also make great peanut butter sammies.

This week, we have company in town, so I made regular and Gluten-Free for options.  I loved the flavor of the Gluten-Free ones and didn't find they lacked for texture, either.  The fam said the regular 'cakes were delish as well.  Regulars were adapted from Mark Bittman's How to Cook Everything and the Gluten-Free were adapted from Karen Robinson's Cooking Gluten-Free!: A Food Lover's Collection of Chef and Family Recipes Without Gluten or Wheat

Pancakes (Gluten-Full)
  • 2C flour (I use 1/2 all-purpose & 1/2 whole wheat)
  • 1T baking powder
  • 1/2t salt
  • 1.5T sugar or 1T agave
  • 1 or 2 eggs (or 1egg & 1egg white)
  • 1-2c milk (cow, soy, almond, rice.....)
Directions:
1. Preheat griddle or large skillet over medium heat while you make the batter
2. Mix together the dry ingredients.  Beat the egg(s) into 1c of the milk, then gently stir the milk/eggs into the dry ingredients, mixing only enough to cover the flour- many lumps will remain.  Add additional milk to adjust the thickness to your preference.  3. Put a bit of butter or oil in you skillet (you can skip this if using a non-stick), then drop into pan in ~1/4c blobs, leaving a few inches between if you care about them touching.
4. Cook them 1-2 minutes, until you see the top bubbling and the bottom golden brown, then flip for 1-2 minutes to brown the other side.
5. You can hold them in the oven on warm while cooking or just serve them up as they go!

Gluten-Free Pancakes
  • 1C Buckwheat or Quinoa Flour
  • 1C Gluten-Free All-Purpose Flour (Wendy Wark's or Tom Sawyer's are great) 
  • 1/2t Salt
  • 1t Cream of Tarter
  • 1/2t Baking Soda
  • 2t Baking Powder
  • 1/4c Sugar (or 2-3T agave)
  • 1/2c Vegetable oil (or 1/4c oil and 1/4c apple sauce)
  • 3 Eggs (or egg substitute- I used 2 eggs and 1T flax meal mixed with 2T water)
  • 1-11/2C Milk (Cow's, soy, almond, rice...)
Directions:
1. Preheat griddle or large skillet over medium/medium-low heat while you make the batter
2. Mix together the dry ingredients.  Beat the egg(s) into 1c of the milk, then gently stir the milk/eggs into the dry ingredients, mixing only enough to cover the flour- many lumps will remain.  Add additional milk to adjust the thickness to your preference. 
3. Put a bit of butter or oil in you skillet (you can skip this if using a non-stick), then drop into pan in ~1/4c blobs, leaving a few inches between if you care about them touching.
4. Cook them 1-2 minutes, until you see the top bubbling and the bottom golden brown, then flip for 1-2 minutes to brown the other side.  These pancakes cook much faster than the other recipe, so a lower heat is a good choice
5. You can hold them in the oven on warm while cooking or just serve them up as they go!

All good parents give their toddler a knife to help mix with, right?


If you like berries, just add some onto the batter once you drop them in the pan.

Serve with warm maple syrup and butter or peanut butter or powdered sugar....

Remember to keep the leftover pancakes in the freezer and toast them in the toaster for healthy snacks!