Tasty and mostly simple food for the whole family.

Tasty, healthy, simple, verstile, practical, seasonal, fun food for all to enjoy. I will endeavour to make things gluten-free, dairy-free (cow's milk only here, I'm not super-human), and low sugar as able. I hope others feel motivated to add their recipes to this collection so we can all try them. Thank you!

Thursday, April 14, 2011

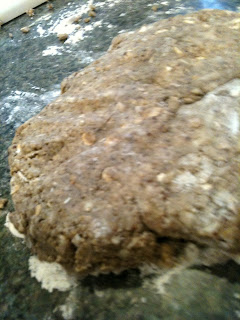
Maple Syrup Oat Scones (Gluten-Free/Adaptable)

I saw this scone recipe a few weeks ago on the Smitten Kitchen website and pretty much rushed out and made them that day.  I have only made my gluten-free adaptation, but I imagine the original version as she posted was amazing as well.  The only downfall of the gluten-free version is that they don't rise as much, but anyone who eats gluten-free baked goods or bread knows this is the way it goes.  Also, I have this need to always cut some of the butter or oil from most of the baked goods I eat, so this also likely affected the fluff factor, as my version cut 1/3 of the fat.  Furthermore, I am constantly playing with different flours to increase the protein and nutrient value, so a simpler flour mix may also be lighter.  You choose!

We ate every last scone in an 18-hour period and I have just been too busy to make them again, or I would have made them a few more times since.  Mia loved them and not just because we had "scones for dinner" that night.  These will surely make a great addition to any Easter brunch or any regular breakfast (or dinner!) for that matter.

For the standard flour version, I will simply send you here for the original post that I adapted the following recipe from.

Gluten- free Maple Syrup Oat Scones (makes 8-10 scones)
  • 1 3/4 cups all-purpose gluten-free flour, plus extra for dusting surface (or see below for the combination I used)
  • 1/2 cup oat flour (see this recipe for how to make this flour if you don’t have it on hand, or use a different flour to substitute if you like)
  • 1/2 cup rolled oats
  • 1 very heaped tablespoon baking powder (very heaped)
  • 1 very heaped tablespoon granulated sugar
  • 1/2 teaspoon table salt
  • 3/4 cup (unsalted butter, cut into pieces (I used 1/2c butter and 1/4c applesauce)
  • 1/4 cup maple syrup
  • 1/4 cup milk or buttermilk (I used almond milk)
  • 1 egg, beaten (for glaze) (I skipped this because I forgot- no big deal)
(Fawn’s GF flour combo: 1/3c buckwheat flour, 2.3c Tom Sawyer’s flour, 1/4c brown rice flour, 1/4c crushed pecans, 1/4c garbanzo flour)

Directions:
1. Preheat your oven to 400°F. Butter a baking tray or line one with unbuttered parchment paper.

2. Whisk the flours, oats, baking powder, sugar and salt together in a large bowl. With a pastry blender or your fingertips, work the butter into the dry ingredients until the mixture resembles fine breadcrumbs. In a small dish, combine the milk and syrup, then add these liquid ingredients to the butter-flour mixture. By hand or with a rubber spatula, bring everything together to form a dough. If it feels too dry, add a little more milk but not enough that the dough is too, too sticky.  Remember that gluten-free baked goods will not have the same consistency of their gluten-full counterparts, so the dough will be much stickier here.

3. On a lightly floured surface, pat or roll the dough out until it is 1 1/4 inches (3 cm) tall. Using a 2-inch (5-cm) cutter, cut the dough into rounds and place them on the prepared tray so that they almost touch. Glaze the tops with beaten egg (or not)  and bake for 20 to 25 minutes until the scones are lightly golden.
"heaping"!
Just use a glass to cut the scones if you don't have a biscuit cutter.  Delicious!

Wednesday, March 30, 2011

Skillet Penne & Sausage Supper (Gluten-Free/Adaptable, Dairy-Free/Adaptable)

Time for some serious home cookin' here in the Great Northwest.  While our family did have one blissful week of sun and BBQ while watching spring baseball and talking endless Physical Therapy with good friends, we are back to what may be the rainiest six months ever in Seattle (somehow, rain just isn't as romantic when I can't leave the house on a whim with my snowboard anymore...).  Gratefully there is the kitchen and my beautiful 2-and-a half-year-old sidekick who is showing lots of interest in being in the kitchen with me. 

This has been one of my friends and my favorite easy meals for several years now and it just occurred to me the other day to adapt it for a gluten/dairy sensitive meal and enjoy it again.  I found that the brown rice pasta I used absorbed less stock than it's semolina cousin, so I would reduce it by a bit from the original next time.  I had to simmer it several minutes longer to absorb/evaporate the extra broth which left the pasta much softer than I would prefer, but Mike loved it ("It's almost like a stroganoff").  Gratefully he doesn't mind a mushy noodle, but I will change the ratio in the list below for others.  I hope you like it!  I further adapted it to suit what I had on hand in the kitchen and strongly encourage you to do the same as it is very forgivable and delicious.  Also, its fast!

Skillet Penne & Sausage Supper
  • 1 tbls Olive oil
  • 1 Onion minced (I skipped this, I didn't have one)
  • 1 lb. Chicken or Turkey sausage, casings removed
  • 3 medium Garlic cloves, minced
  • 1/2 C Oil-packed Sun-dried tomatoes, rinsed and chopped fine (canned diced tomatoes will sub in here fine if you don't have SD-toms on hand)
  • 8 oz penne (~2.5C) - I used Trader Joe's Brown Rice Penne
  • 2 C Low-sodium Chicken broth
  • 1/2C Heavy cream (I subbed MimicCream)
  • 5oz baby spinach leaves (I used dried wild mushrooms and peas instead tonight)
  • 1oz grated Parmesan or Pecorino (~1/2cup)
  • salt & pepper
Directions
1.  Heat oil over medium heat in deep sided 12" skillet until shimmering .  Add the onion if using and about 1/2tsp salt and cook until softened, about 5 minutes.
2.  Stir in the sausage and cook, breaking up the meat with a wooden spoon, until no longer pink, about 4-5 minutes.
3.  Stir in the garlic and cook until fragrant, about 30 seconds.  Sprinkle the tomatoes over the sausage.  If you are substituting something instead of the spinach, this is a great time to add it to the mix.  Pour the broth and cream or MimiCream over the pasta.  Cover and bring to a boil.  Reduce the heat to medium-low and continue to simmer, stirring occasionally, until the pasta is tender.  About 10 minutes for semolina pasta, or about 12-15 minutes for rice pasta.
4. Stir in the spinach a handful at a time and cook until wilted, about 2 minutes.  Stir in the Parmesan or Pecorino and season to  taste with salt & pepper.

I added a bit of broth to deglaze the pan before putting the pasta and such in because the bits on the pan are just too good to not scrape up into the sauce!

Tuesday, March 15, 2011

Simple Split Pea Soup

We recently spent the weekend enjoying copious amounts of indulgent, delicious food and (plenty of) drinks while celebrating a friend's wedding here in town.  On the heels of such debauchery, a simple meal was required.  The following 'recipe' is really just a simple way to put together a few ingredients that are easily stored in the kitchen for a quick, healthy and filling meal. 

In addition, this makes an excellent Friday meal for those observing Lent....

Ingredients:
  • 1tbls olive oil
  • 1 medium shallot or small onion, finely chopped
  • 1 medium garlic clove, minced
  • 2 cups split peas, rinsed and picked over
  • 4-6 cups of water or low-sodium chicken or vegetable stock
  • ~1 tsp salt, divided
  • ~1 tsp freshly ground pepper, divided
Directions:
1. In large pot over medium-high, heat olive oil and add the shallot or onion with about 1/2tsp salt and 1/2tsp pepper. Saute until transparent, about 5 minutes.  Then add the garlic and saute for a minute or so more.
2.  Add the split peas and 4 cups of the water or stock, and bring to a boil.  Once boiling, reduce heat, cover and simmer for about 45 minutes, stirring periodically.  You may need to add additional water/stock if the peas absorb it too much.
3.  Once cooked, adjust the flavor with salt and pepper to taste and adjust the consistency with additional stock or water as you like. 

Serve with a good crusty bread (try this one) and if you like, sprinkle with pecorino or parmesan.  Also, I often make it very thick so we can scoop it over a bowl of rice.  Yum!
Shallots here.  I prefer them for their sweeter and more delicate flavor vs. the mighty onion.

Ready!

Saturday, March 5, 2011

Oat Soda Bread (Gluten-Free Adaptable/Dairy-Free Adaptable)

People, this is NO APOLOGIES GLUTEN-FREE BREAD!  With crust and chew and no strange sponginess.  Gluten-free eaters will know what I am talking about.  I haven't even made the recipe with wheat flour because it is so dang tasty without.  I can only imagine that the gluten-full recipe is amazing, too, maybe even with spelt or rye as noted in the original recipe.  I have been making this for several weeks now and keep varying the gluten-free flours I use and they are all delicious in different ways.... use Tom Sawyer's flour for a more white, neutral flavor; use garbanzo &/or brown rice flour for a more substantial and round flavor with more protein; use quinoa and .....  you get the picture.  I think the next time I make it I will try it in part with my new favorite 'flour' of finely crushed pecans or almonds to make a good breakfast version.  Anyway, eat it plain with good salted butter, with jam, soup or the next day as a PB & J.  So good!  And very fast to make, too.  I strongly recommend making at least 4C worth of the oat flour, because you will want another loaf very soon and this  makes it even faster the next time.

Ingredients:
  • butter, to grease pan
  • 2 c rolled oats
  • 2 1/4C unbleached all-purpose flour*, plus more for dusting and kneading
  • 2tsp xanthan gum* (only if making gluten-free)
  • 1 3/4 tsp baking soda
  • 1/4 tsp fine-grain sea salt
  • 1 3/4 c buttermilk**, plus more if needed, and 2T. for brushing
  • mixed seeds - sesame, caraway, poppy, etc. (I like black and golden sesame seeds)

* If Tom Sawyer's Gluten-Free Flour here, it has the xanthan gum mixed in, otherwise you can substitute your favorite gluten-free flour mix and make sure it either has xanthan gum in it, or use approximately 1tsp Xanthan Gum:1cup flour.  Round down for partial cup measurements, for example here, use 2tsp Xanthan Gum with the 2-1/4c flour
** I made my own buttermilk as noted in this previous recipe for buttermilk biscuits, using 1-3/4c soy milk or almond milk with 1-3/4tsp white vinegar

Instructions:
1.Preheat the oven to 400°F with a rack in the middle of the oven. Butter and line a 9x5x3 inch loaf pan (or one with ~8 cup capacity) with parchment paper and set aside.
2. To make the oat flour, use a food processor to pulse the rolled oats a few times. Then process into a fine powder - another minute or two. If you are buying oat flour, not making your own, measure out a scant 2 cups. (skip this step if you have oat flour in your pantry already, I don't typically)
3. Sift the flours, baking soda, and salt into a large bowl. Make a well in the flour and pour in the buttermilk. Stir just until everything comes together into a dough. Turn out onto a lightly floured counter top and knead for 30 seconds or so, just long enough for the dough to come together into a cohesive, slightly flattened ball without many cracks or fissures. If your dough is on the dry side, add more buttermilk a small splash at a time.
4. Now ease the dough evenly into the prepared baking pan. Brush all over the top and sides with buttermilk and sprinkle generously with mixed seeds or flour, 2 tablespoons or so. Slice a few deep slashes across the top of the dough. Bake for about 30 minutes, then quickly (without letting all the hot air out of the oven), move the rack and the bread up a level, so the top of the bread gets nice and toasted. Bake for another 20 minutes, or until a hard crust forms and the bread is baked through. It will feel very solid and sound hollow when you knock on it. Carefully lift it out of the pan and allow to cool on a wire rack.

Oats in the food processor~
"buttermilk"- actually almond milk with vinegar in this batch. 

Yes!

Adapted from this recipe by Heidi Swanson.

Friday, February 25, 2011

Sunday Pancakes (Whole Wheat or Gluten-Free Quinoa/Buckwheat)

These are only Sunday Pancakes because I never think to make time for pancakes during the week.  They are, however, fast and easy to make so could very well be Everyday Pancakes.  Usually I make a full batch and freeze the leftovers so I can just pop them in the toaster and eat in a pinch during the week.  They also make great peanut butter sammies.

This week, we have company in town, so I made regular and Gluten-Free for options.  I loved the flavor of the Gluten-Free ones and didn't find they lacked for texture, either.  The fam said the regular 'cakes were delish as well.  Regulars were adapted from Mark Bittman's How to Cook Everything and the Gluten-Free were adapted from Karen Robinson's Cooking Gluten-Free!: A Food Lover's Collection of Chef and Family Recipes Without Gluten or Wheat

Pancakes (Gluten-Full)
  • 2C flour (I use 1/2 all-purpose & 1/2 whole wheat)
  • 1T baking powder
  • 1/2t salt
  • 1.5T sugar or 1T agave
  • 1 or 2 eggs (or 1egg & 1egg white)
  • 1-2c milk (cow, soy, almond, rice.....)
Directions:
1. Preheat griddle or large skillet over medium heat while you make the batter
2. Mix together the dry ingredients.  Beat the egg(s) into 1c of the milk, then gently stir the milk/eggs into the dry ingredients, mixing only enough to cover the flour- many lumps will remain.  Add additional milk to adjust the thickness to your preference.  3. Put a bit of butter or oil in you skillet (you can skip this if using a non-stick), then drop into pan in ~1/4c blobs, leaving a few inches between if you care about them touching.
4. Cook them 1-2 minutes, until you see the top bubbling and the bottom golden brown, then flip for 1-2 minutes to brown the other side.
5. You can hold them in the oven on warm while cooking or just serve them up as they go!

Gluten-Free Pancakes
  • 1C Buckwheat or Quinoa Flour
  • 1C Gluten-Free All-Purpose Flour (Wendy Wark's or Tom Sawyer's are great) 
  • 1/2t Salt
  • 1t Cream of Tarter
  • 1/2t Baking Soda
  • 2t Baking Powder
  • 1/4c Sugar (or 2-3T agave)
  • 1/2c Vegetable oil (or 1/4c oil and 1/4c apple sauce)
  • 3 Eggs (or egg substitute- I used 2 eggs and 1T flax meal mixed with 2T water)
  • 1-11/2C Milk (Cow's, soy, almond, rice...)
Directions:
1. Preheat griddle or large skillet over medium/medium-low heat while you make the batter
2. Mix together the dry ingredients.  Beat the egg(s) into 1c of the milk, then gently stir the milk/eggs into the dry ingredients, mixing only enough to cover the flour- many lumps will remain.  Add additional milk to adjust the thickness to your preference. 
3. Put a bit of butter or oil in you skillet (you can skip this if using a non-stick), then drop into pan in ~1/4c blobs, leaving a few inches between if you care about them touching.
4. Cook them 1-2 minutes, until you see the top bubbling and the bottom golden brown, then flip for 1-2 minutes to brown the other side.  These pancakes cook much faster than the other recipe, so a lower heat is a good choice
5. You can hold them in the oven on warm while cooking or just serve them up as they go!

All good parents give their toddler a knife to help mix with, right?


If you like berries, just add some onto the batter once you drop them in the pan.

Serve with warm maple syrup and butter or peanut butter or powdered sugar....

Remember to keep the leftover pancakes in the freezer and toast them in the toaster for healthy snacks!

Sunday, February 20, 2011

Baked Ziti (Gluten-Free/Dairy-Free Adaptable)


Mike's folks are in town this weekend and we made delicious regular and gluten-free pancakes which I will post soon, but we collectively decided that pancakes are not a good Sunday evening recipe to post- who is going to remember them by the end of the week?  On the other hand, Baked Ziti (or penne or rigatoni) is a great weekday dinner.  Furthermore, this recipe in particular lends itself very well to splitting into two batches and freezing for later use, or packing up to give to another family who could use some meal help. This is also a very fast and easy recipe to throw together quickly.  Recently we made a batch for a co-worker's family and were told that their finicky toddler ate it up- serious praise if you know just how discerning a toddler can be!
And while we are talking about toddlers, why not toss in a handful of finely chopped or pureed spinach or zucchini into the sauce when you are making it to boost the goodness?

Ingredients:
  • 1lb Ziti, Rigatoni, Penne or other totally tubular pasta*
  • 2C Mozzarella cheese, shredded**
  • 1/4C Pecorino or Parmesan cheese**
  • 5-6C Marinara (See Below) or Roasted Tomato Sauce
  • 1lb ground beef, ground turkey breast or chicken/turkey sausage (optional)***
Quick Marinara
  • 1T Olive Oil
  • 2 Garlic cloves, minced
  • 1 (28oz) can crushed tomatoes
  • 1 (14.5oz) can diced tomatoes
  • 2T minced fresh basil or 2T basil pesto
  • 1/4t sugar
  • salt/pepper to taste
Directions:
1.  Adjust oven rack to the middle position and heat to 400deg.  Meanwhile, bring 4qt of salted water to boil in large pot.
~*(see note below regarding using the ground meat)~
2.  If using already made sauce, heat it on the stove on medium heat in small/medium sauce pan.  Otherwise, prepare the Quick Marinara as follows: Heat the olive oil and garlic in a medium sized sauce pan over medium  heat until garlic is fragrant (~1-2 minutes).  Stir in the tomatoes with the juice and bring to simmer, cooking until sauce thickens slightly, about 15 minutes.  Stir in the basil/pesto, sugar and salt/pepper to taste.
3.  Cook the pasta according to directions for 'al dente' and drain the pasta, reserving 1/2 cup of the pasta water.
4.  Return pasta to the pot, then add the sauce to the pasta and stir, using the reserved pasta water to loosed the mixture as needed.
5.  Spread half of the pasta mix into an oiled 9x13" pan (or 2 9x9" pans), sprinkle half of the Mozzarella and half of the parm/pec.  Spread the remaining pasta mix and cover with the rest of the cheese.
6.  Bake until cheeses turn golden brown, about 20  minutes.  Let stand ~5min before serving.

*Gluten-Free Note: I used Trader Joe's Brown Rice Penne and it was delicious!  I haven't tried freezing these noodles yet,  but with all leftover GF pasta, I would add some extra liquid during the second heating process.  Please, if anyone tries this, do leave a comment for all of our growth.

**Dairy-Free Note: I used soy-cheese and Pecorino and it was also great for me.  Try any cheese alternative here as long as it melts.  Even a goat Feta would be excellent!

***Meaty Note:  If using ground beef, sausage, turkey or your favorite other choice, add this to the pan and cook it fully prior to adding your Roasted Tomato Sauce.  If using the Quick Marinara, add it in the oil/garlic step and continue as listed once the meat is fully cooked.  Incidentally, in our house we found that half turkey breast and half chix sausage is our favorite mix.  I typically make a boatload of the meat sauce and freeze what I don't use for quick future meals.


Because I was making a standard pasta and GF option,  I didn't mix the noodles with the sauce this time- instead I layered them all in like a lasagna so I could make one sauce, but separate pans of noodles.

Immediate on the L, freezer on the R


This is the GF/DF version- yum!
~Adapted from a recipe in The America's Test Kitchen Family Cookbook, revised edition.

Saturday, February 12, 2011

The Chocolate Chip Cookies

I feel pretty sure that these just may be the best ever chocolate chip cookies ever in the whole wide world.  They have completely allowed me to get my Chocolate Chip Cookie Confidence back, which had been deeply damaged for years.  Since I have only slightly adapted this from a Cooks Illustrated recipe in the May/June 2009 issue, I can say this without any ego involved.  You will have to try them to confirm, but I look forward to the feedback.  They are absolutely full of all things gluten, dairy, sugar, egg and you-name-it, and should never be stripped of their very necessity in creating this harmony of sweet success. 

The need for me to find this recipe had been deep and long-lasting.  Many lifetimes ago, I actually used to be a good baker- even baked for a few different restaurants - but I went a desperately long decade+ with rock-bottom Chocolate Chip Cookie Confidence.  Year after year of crispy, hard, nasty attempts had left me but a puddle of pathetic memories and almost pure fear-avoidance behaviours when the thought of trying again came along.  If I hadn't been able to make Oatmeal or Snickerdoodles, I may not have made it at all. 

The relevance of this is very profound, since I married a man who loves cookies as much as baseball or family.  He is powerless against even the most modestly tasty cookie- so one can only imagine how I must have felt when four years ago, after a fresh batch of nasties came out of the oven, he replied "no thank  you" without even looking me in the eyes.  NO THANK YOU? .....NO THANK YOU???? Naturally, I was furious.  I proceeded to chip the rest of the cookies off of the cookie sheet and let them shatter into the compost bin.  Then I waited..... and then these appeared.  They are perfect- chewy, but with a bit of a crispness to the edge and they stay soft until the very last cookie is gone.  They are rich and toffee-like, but not so much that you can't eat the whole batch if you are so inclined.


The Cookies (makes 22-24 cookies: serves 1)

Ingredients:
  • 1-3/4C unbleached all-purpose flour*
  • 1/2t baking soda
  • 14T (1-3/4sticks) unsalted butter**
  • 1/2C granulated sugar
  • 3/4C packed dark brown sugar
  • 1t table salt
  • 2t vanilla
  • 1 large egg (umbilical cords removed, obviously)
  • 1 large egg  yolk (remove these, too)
  • 1 to1-1/4C semi-sweet chocolate chips
  • 3/4 C chopped pecans or walnuts (totally optional- These don't fly in our household)
Directions:
1.  Preheat oven to 375 and adjust oven rack to middle position.
2.  Line large baking sheet with parchment paper.
3.  Whisk flour(s) and baking soda together in small/medium bowl and set aside.
4.  Heat 10T of the butter in a small/medium skilled over medium heat until melted, about 2 minutes.  Then continue cooking with heat on med-high swirling pan continuously until butter is dark golden brown and has a nutty aroma- 1-3 minutes longer.  Remove the skillet front the heat and, using large heatproof spatula, transfer the browned butter to a large heatproof bowl.  Stir the remaining 4T butter into the hot butter until completely melted.
5.  Add both sugars, salt, and vanilla to the bowl with the butter and whisk until incorporated.  Add the egg and yolk and whisk until mixture is smooth with no sugar lumps left, about 30 sec.  Let the mix stand and rest for 3 minutes, then whisk for 30 sec.  Repeat the process of resting and whisking 2 more times- it will become thick, shiny and smooth. 
6.  Using spatula or wooden spoon, stir in flour mixture until just combined, then stir in chips (and nuts) until just completely combined.
7.  Scoop in 2T heaps (I use a cookie/ice cream scooper) onto prepared sheets, leaving ample space for the cookie to spread out.  I put ~8 per sheet.
8.  Bake cookies one tray at a time until cookies are golden brown and still puffy and edges have begun to set, but centers are still soft- about 9-12 minutes.  If you are quite particular, you can rotate the pan half way through for complete perfection.  Transfer to wire rack to cool if you think they will last that long.

*I often mix white and whole wheat with no flavor or texture sacrifice- that makes them healthy, right?
**If you don't have unsalted butter in your pantry, reduce the salt in the recipe by maybe 1/2 or so

NOTE:  Important final note here.... Do not be put off by the apparent extra steps of melting the butter and such.  First of all, they are so flipping good, you will never go back once you have tried them.  Second of all, it is actually quite a time saving measure given that you no longer need to go through the arm aching steps of creaming the butter and sugars together.  Plus, while you are letting it all rest for 3 minutes, you can get all of the cleaning done and it is all a wrap when the cookies are out of the oven.  For me, it is much easier than typical recipes.  Try it!

Bubblin' butter in the pan- keep swirling...

Get all those browned bits!


We all need some space

Perfect?


Valenintes greetings to all!