Tasty and mostly simple food for the whole family.

Tasty, healthy, simple, verstile, practical, seasonal, fun food for all to enjoy. I will endeavour to make things gluten-free, dairy-free (cow's milk only here, I'm not super-human), and low sugar as able. I hope others feel motivated to add their recipes to this collection so we can all try them. Thank you!

Monday, July 11, 2011

Sheep's Milk Feta Cheese


This is the most amazing thing in the world of feta cheese.  Even before learning that I was princess sensitive to cow's milk/dairy, you would find me eating sheep and goat cheese over cow any day.  Now that this has become more of a lifestyle for me, I can't possibly imagine living without this cheese. 

It is tangy and creamy and perfectly balanced.  Delicious on salads, pizzas, sandwiches, in quinoa dishes (such as the Quinoa Tamale, Mediterranean Quinoa, or just tossed in a bowl of it!), on pasta, with crisp apples & pears and....

I find it at Trader Joe's and buy at least 3 bricks every time. 

Enjoy!

Thursday, June 23, 2011

Mango Banana Recovery Ice Cream (Dairy Free)


Are you running in the Rock & Roll Half/Full Marathon this weekend in Seattle?  If so, please do consider this as quite possibly the BEST recovery snack to have in your first 30 minutes after running to replenish your depleted nutritional resources.  Seriously, this is perhaps the most perfect post-race food and totally delightful at the same time. 

Not to mention the fun for me of finally talking my daughter into the fact that ice cream is delicious and fun, even though it is cold.  Hard to be ice cream without the cold part.  Anyway, now she is totally into it and I can take heart in the fact that this ice cream is full of fresh fruit and calcium rich almond milk and juice.  That's it!  Also, feel free to play with the fruit and juice you toss in to work with whatever is in your freezer.

Of course this is good for an everyday ice cream treat as well!

Mango Banana Recovery Ice Cream

1 banana, frozen in pieces
3/4 cup or so frozen mango pieces
2-4 Tbls Almond milk (or any other milk-type... rice, soy, cow....)
2-4 Tbls Orange Juice (optional)

Directions:

In high powered blender or food processor, toss in the banana and mango, then add a few tablespoons of  almond milk (I just put in a long drizzle).  Start the blender or food processor going and slowly add a tablespoon (or glug) at a time of milk and/or juice.  Use more milk to make it ice creamier and more juice to make it creamsickle-ey-er.  Then scoop it into your favorite delivery item.  Mia is a fan of the cone and they make perfectly good gluten-free cones to be had at any grocery store these days.  Or any other cone, or cup, or cookie....

Makes about 3 good sized servings.  I recommend immediate consumption for a good soft texture, but it does freeze well for later eating if for some unrecognizable reason you can't finish it all.

Beautifully smooth!

Can you argue with that?

Sunday, June 19, 2011

Raspberry Oatmeal Bars (Gluten-free)


I am a huge fan of having guest bloggers here on Fawnalicious.  So far only Katie has with her fantastic Basque Red Bean Soup. I have been super busy lately getting the new PT clinic up and running so have barely had chance to cook for myself and the family, much less write about it.  So this brings us up to today's delicious recipe from the Great Auntie Bert.  Now, while everything that follows is her creation, this is my blog after all and therefore I get to take a moment to talk about her. 

Bert is a special friend, colleague, godmother and 'Auntie' to our daughter.   I hope beyond hope that anyone reading this has friends like her.  She is one of those friends that makes your life easier by just being a part of it.  Anyone who knows her is aware of the love and generosity she brings to those she spends time with.  She makes being a parent a little easier with each visit shared.  And now she comes through again with the following recipe which she happens to have talked big about for weeks now, but I have never tasted since they get gobbled up by anyone who comes close to them.  Now I will make them my darn self.


From Bert:

"This is a lovely treat, which is super easy and can be a little more sweet or less sweet depending on how you might choose to adapt it. It has been used a breakfast bar in a pinch, or a pre-exercise snack.

Prep time 10 min, bake time 30 min, and they freeze well~

Makes 16 bars

I am not a stickler for following recipes and this with this one you can get away with that behavior for sure!

Bert’s Gluten-free Raspberry Oatmeal Bars

  • 1 1/4 cups gluten free flour
  • 1 tsp. ground cinnamon
  • 1/2 tsp. baking soda
  • 1/4 tsp. salt
  • 1 cup light brown sugar
  • 1/2 cup (1 stick) unsalted butter, softened
  • 1 large egg
  • 1 tsp. vanilla extract
  • 1/2 tsp. almond extract
  • 2 cups old-fashioned rolled oats, divided
  • 1 cup raspberry jam
  • 1 large handful of choc chips 43% cacao (optional, although why wouldn’t you!)
  • 1 medium handful of walnuts chopped, (optional)

Directions

1.Preheat oven to 350°F. Coat 9-inch-square baking dish with cooking spray.

2.Combine flour, cinnamon, baking soda, and salt in large bowl.

3.Cream sugar and butter until light and fluffy. Beat in egg and vanilla and almond extracts until smooth. Add flour mixture to butter mixture; mix until combined. Stir in 13/4 cups oats. Spread 2/3 of batter on bottom of prepared baking dish. Spread raspberry jam over the batter with back of spoon.

4.Add remaining 1/4 cup oats to remaining batter. Crumble over top of raspberry jam. Bake 30 minutes, or until golden. Cool, then cut into bars.

Bert's fav gluten-free AP flour blend

In the mix!


(adapted from many sources…..)"

Monday, June 6, 2011

Chocolate Chip Blondies (Gluten-free/Dairy-Free)


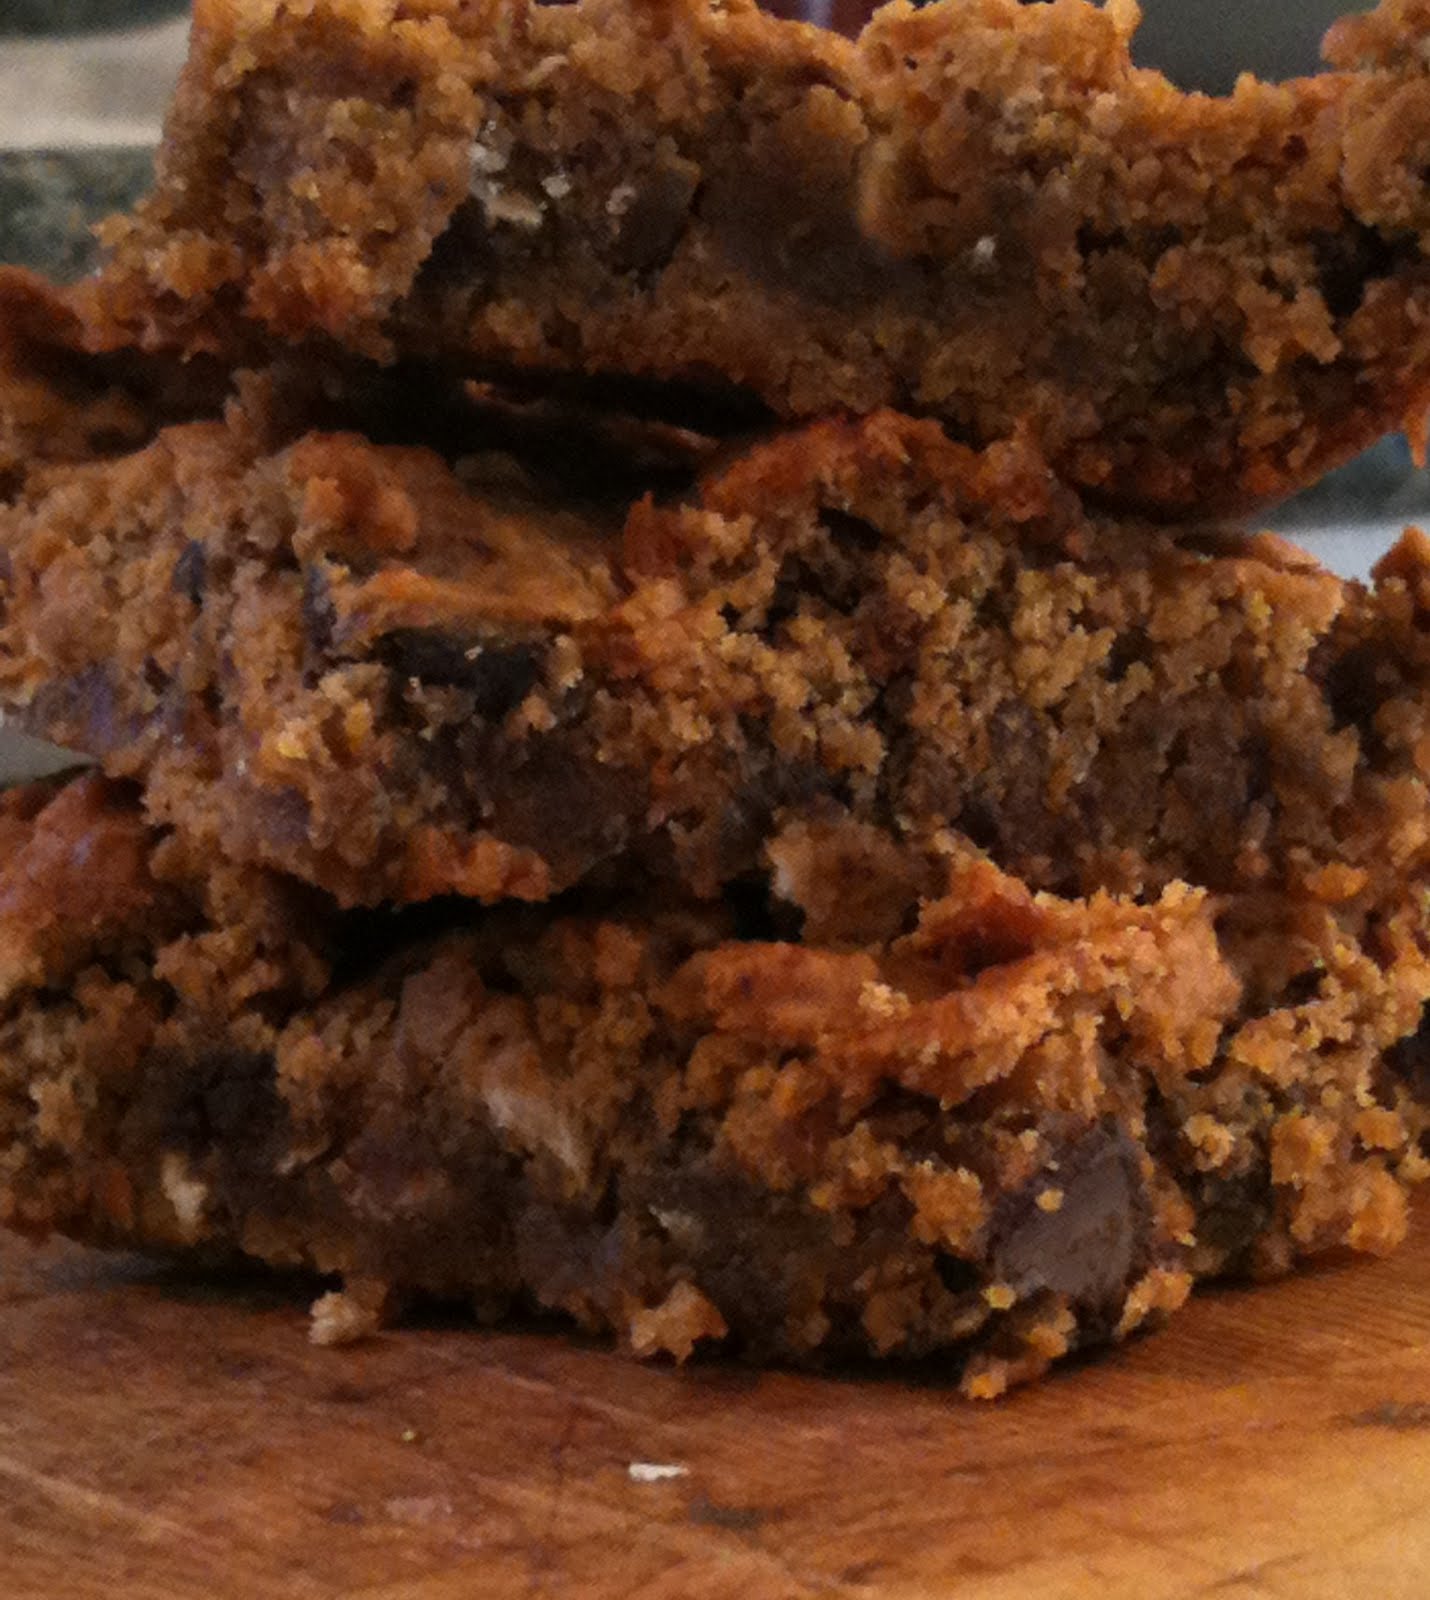
I was quite intrigued when I stumbled on this recipe the other day.  It looked tasty, but garbanzo beans?  Yes! I have been amazed at how delicious these are and how versatile.  The original recipe doesn't have oats in them and I found them to be a bit too Japanese-bean-cake-like for what I was going for, so I have added in oats along with a few other minor changes and like what they bring, although the day after I made the first batch, they were a much better texture.  The oats allow for immediate enjoyment, however.  And this is FAST!  I can have the batter made before the oven preheats.  Doesn't even cut into precious nap time barely at all.  Furthermore, this is the only way I can sneak peanut butter into the wee one and just about the only source of protein she eats anymore. 

 Chocolate Chip Blondies
  • 1 1/2 cups garbanzo beans (1 can, drained and rinsed)
  • 3/4 tsp baking powder
  • 1/8 tsp baking soda
  • heaping 1/8 tsp salt
  • 2/3 cup brown sugar* (less if you like, even Mia thinks 1/3-1/2c is fine)
  • 1 tsp vanilla extract
  • 3 or so Tbls ground flax (optional but great for nutrition and texture)
  • 1/4 cup peanut butter (or other oil or soft butter if not using nut butter)
  • 1/4-1/3 cup chocolate chips ( I use mini chips because they go further)
  • handful of oats (maybe ~1/4cup?) 
  • splash of milk (I use almond milk.  love it) Maybe 2-4 Tbls?  See below
*coconut sugar works well in these as does raw sugar and the like
 
Directions

Preheat oven to 375 degrees. Blend all ingredients except chips and oats until very smooth- I have used both a blender and a food processor.  Add the (almond) milk a small splash at a time into the blender to ease the mixing and lesson the chance of busting your blender (or your host's blender as the case may be).  Mix in chips and oats, and scoop into a greased or parchment lined 8×8 pan. Bake for 33-35 minutes.  I find that in the batches that I add oats to, the cooking time is on the shorter end.  Without the oats, they stay quite a bit gooey-er and need the longer end.  They will be super gooey when they first come out, but will firm up, so don't be tempted to overcook them!

(Note for amended recipe with milk: I find this really helps reduce the excessive gooey-ness, yets keeps it modestly moistureful).
Why wouldn't you just mix the oats and chips in the pan?


And why not a double batch?

Adapted from this recipe by "Chocolate Covered Katie"

Friday, May 27, 2011

Mediterranean Quinoa (Gluten-free)

This is a quick, healthy and delicious dish.  It comes together in a pinch and most kitchens will have the ingredients on hand to pull it together easily any night, especially if you keep pesto around like I do. If you don't have it in your kitchen, use what you have and I bet it will be great.  It makes a great potluck dish and is easily doubled or tripled for big gatherings.  It is delicious cold the next day if it makes it that far.

This is the dish that made me fall in love with quinoa.  I am not one to mix sweet and savory typically, but this recipe is perfectly balanced in that way.  Furthermore, I am always wanting to reduce the added oils and such to recipes, but I wouldn't touch it here.  Somehow the olive oil, herbs, feta and currants are just perfectly matched.  The currants make the just right tiny sweetness.  I am just too lazy to chop herbs, so I always use whatever pesto I have on hand in the freezer or fridge.

Mediterranean Quinoa (total time 25-30 minutes)
  • 1cup quinoa
  • 13/4cups water
  • 1/2tsp salt
  • 1/4cup pine nuts, toasted (or almonds, pecans, etc)
  • 1/4cup olive oil
  • 1/4cup lemon juice
  • 3-4Tbls chopped fresh basil, Italian parsley &/or cilantro (I use about 2T cilantro pesto or parsley pesto and 2T basil/spinach pesto)
  • 1/4cup currants (you can use chopped raisins if you like)
  • 1/3cup feta cheese, crumbled
Directions
In 2-quart pot, add water and salt and bring to a boil.  Add quinoa to pot and reduce heat to low, simmer 20 minutes.  Once cooked, turn off heat, take off lid and let rest 5-10 minutes.

Meanwhile, dry-toast pine nuts in skillet on the stove for a few minutes until golden brown.  In medium bowl, combine olive oil, lemon juice and herbs or pesto.  Add currants, pine nuts and feta cheese.  Add warm quinoa to bowl and toss gently.  Serve at room temperature.

Adapted from Feeding the Whole Family by Cynthia Lair

Tuesday, May 10, 2011

Giant Quinoa Tamale (Gluten-Free/Dairy Adaptable)

When I saw a recipe for Quinoa Tamales a few days ago, I just about lost my mind.  I seriously love tamales.  I am highly reactive to corn and have not had the pleasure of enjoying it for a while now, despite the fact that my neighbor actually makes tamales fresh each day for sale in her taco truck.  I am not sure how I ended up waiting three days to make it, but I do know that Mike and I barely spoke when we were eating it yesterday until we agreed at the end of the meal that I would make it again today.  Again we finished it and again it was delicious.

Like all things Fawnalicious, think of this as highly modifiable.  Really this is a recipe for using Quinoa as a base to put stuff into.  I put shredded chicken in ours, but you could put roasted vegetables or beans or carnitas, or ground/shredded beef...etc into it.  It is very easy and low maintenance to make.  It takes a while to make start-to-finish, but it is nearly all unattended.  

The original recipe (posted by the fabulous Mark Bittman) included what is no doubt an amazing recipe for tomatillo salsa.  I didn't have the motivation to make it, so I used  about 1cup of Trader Joe's salsa verde and mixed it with 2-3T cilantro and parsley pesto

Quinoa Tamales
  • 2 Cups quinoa, rinsed and drained
  • 5-6 cups water
  • 1-2 tablespoons olive oil, plus more for greasing the loaf pan
  • Salt
  • 1⁄2 teaspoon baking powder
  • 1-2 cups cheese ( I like it cheesy)- In this house, Sheep’s milk Feta rules and it is no sloppy second.  You could also use crumbled queso fresco or grated Monterey Jack or whatever you like
  • 1 tablespoon chili powder (optional- I skipped it)
  • ½ cup chopped fresh cilantro or some cilantro pesto- for garnish
Directions
1. Heat the oven to 400°F.  Meanwhile, put the quinoa in a large pot along with a big pinch of salt. Add the water 1 cup at a time, to cover by about 11⁄2 inches.  Bring to a boil, then adjust the heat so the mixture bubbles gently. Cover and cook, stirring occasionally, until the grains are very tender, 25 to 30 minutes- until the water is just barely absorbed, it should pretty mushy. If the grains get too dry, add just enough water to keep them submerged. When the grains are starchy and thick, remove from the heat. (You can cook the quinoa up to a day ahead and refrigerate; return to room temperature before proceeding.)

2.When you’re ready to make the tamale, generously grease two 9 × 5-inch loaf pans or one loaf pan and one 9x9-inch square with some oil. Mix the baking powder and a big pinch of salt into the quinoa with a fork (good to taste here and adjust salt). The consistency should be thick but spreadable; if it’s too stiff, add a few drops of water. Spread half of the quinoa mixture in the bottom of the pan and sprinkle with the cheese and chili powder if using. Add the remaining quinoa, smooth it out evenly, and press down a bit to seal the loaf. Cover the pan tightly with foil. (At this point the quinoa loaf can be covered and refrigerated for up to several hours.)

3. Bake the loaf for 30 minutes, then remove the foil and bake until the top is golden brown, another 30 minutes or so. Remove the pan from the oven and let the tamale sit for 10 minutes before turning it out onto a platter (or just serve from the pan). Garnish with the /pesto and a little more cheese, cut the tamale big into slices, and serve, passing salsa at the table.

The first night, I actually made only a half- batch and used half feta and half cheddar.  Feta was the clear winner, so I didn't bother with anything else the next night.  I just layered chicken on top of this layer to stuff it a bit more.  yum!


Thursday, April 14, 2011

Maple Syrup Oat Scones (Gluten-Free/Adaptable)

I saw this scone recipe a few weeks ago on the Smitten Kitchen website and pretty much rushed out and made them that day.  I have only made my gluten-free adaptation, but I imagine the original version as she posted was amazing as well.  The only downfall of the gluten-free version is that they don't rise as much, but anyone who eats gluten-free baked goods or bread knows this is the way it goes.  Also, I have this need to always cut some of the butter or oil from most of the baked goods I eat, so this also likely affected the fluff factor, as my version cut 1/3 of the fat.  Furthermore, I am constantly playing with different flours to increase the protein and nutrient value, so a simpler flour mix may also be lighter.  You choose!

We ate every last scone in an 18-hour period and I have just been too busy to make them again, or I would have made them a few more times since.  Mia loved them and not just because we had "scones for dinner" that night.  These will surely make a great addition to any Easter brunch or any regular breakfast (or dinner!) for that matter.

For the standard flour version, I will simply send you here for the original post that I adapted the following recipe from.

Gluten- free Maple Syrup Oat Scones (makes 8-10 scones)
  • 1 3/4 cups all-purpose gluten-free flour, plus extra for dusting surface (or see below for the combination I used)
  • 1/2 cup oat flour (see this recipe for how to make this flour if you don’t have it on hand, or use a different flour to substitute if you like)
  • 1/2 cup rolled oats
  • 1 very heaped tablespoon baking powder (very heaped)
  • 1 very heaped tablespoon granulated sugar
  • 1/2 teaspoon table salt
  • 3/4 cup (unsalted butter, cut into pieces (I used 1/2c butter and 1/4c applesauce)
  • 1/4 cup maple syrup
  • 1/4 cup milk or buttermilk (I used almond milk)
  • 1 egg, beaten (for glaze) (I skipped this because I forgot- no big deal)
(Fawn’s GF flour combo: 1/3c buckwheat flour, 2.3c Tom Sawyer’s flour, 1/4c brown rice flour, 1/4c crushed pecans, 1/4c garbanzo flour)

Directions:
1. Preheat your oven to 400°F. Butter a baking tray or line one with unbuttered parchment paper.

2. Whisk the flours, oats, baking powder, sugar and salt together in a large bowl. With a pastry blender or your fingertips, work the butter into the dry ingredients until the mixture resembles fine breadcrumbs. In a small dish, combine the milk and syrup, then add these liquid ingredients to the butter-flour mixture. By hand or with a rubber spatula, bring everything together to form a dough. If it feels too dry, add a little more milk but not enough that the dough is too, too sticky.  Remember that gluten-free baked goods will not have the same consistency of their gluten-full counterparts, so the dough will be much stickier here.

3. On a lightly floured surface, pat or roll the dough out until it is 1 1/4 inches (3 cm) tall. Using a 2-inch (5-cm) cutter, cut the dough into rounds and place them on the prepared tray so that they almost touch. Glaze the tops with beaten egg (or not)  and bake for 20 to 25 minutes until the scones are lightly golden.
"heaping"!
Just use a glass to cut the scones if you don't have a biscuit cutter.  Delicious!